Navigate to the products page.
Locate the “Import” button on the top right side of the screen. Then click on the “Import” button. From the drop-down menu that appears, select “Products”.

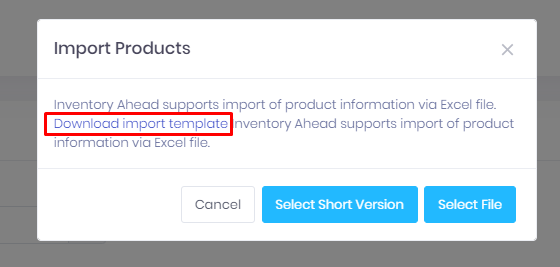
Download the import template from the pop-up
Open the Excel file there will be 3 pages.
- Product information
- Main & Sub
- Kits
Product Information
To create a new SKU or update an existing one, simply enter the SKU in Column B as shown in the sample below.
The system will automatically determine whether the SKU is new or existing.
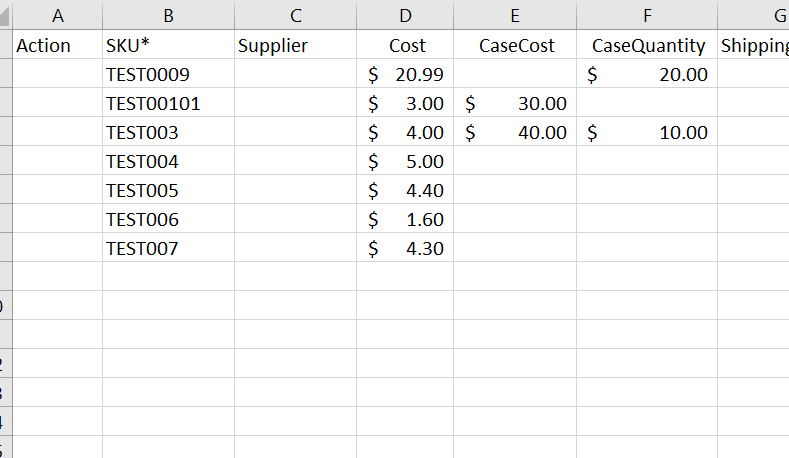
Only the SKU is required to proceed. All other columns are optional but can provide additional benefits.
Main & Sub
In Column A, enter your main SKU.
In Column B, enter your sub-SKU. If you have multiple sub-SKUs for the same main SKU, you must enter the main SKU as often as you have subs.
In Column C, enter the quantity of the main SKU received from the supplier.
In Column D, enter the quantity of the sub-SKU. For example, if you purchase it as 1 piece and sell it as 2 pieces or vice versa.
See the filled example below,

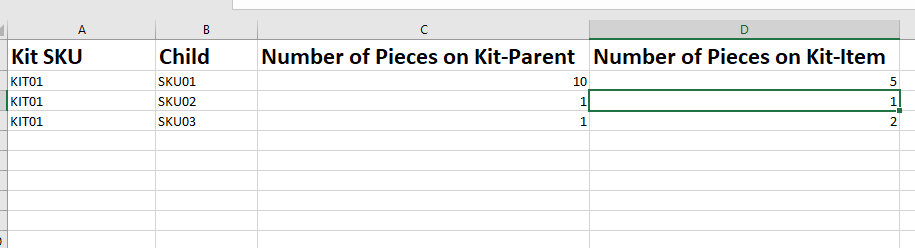
Kits
In Column A, enter the KIT SKU.
In Column B, enter the main SKU in reference to the original item.
Once the Excel file is filled and complete, simply upload the information, and it will be imported.
For your understanding of the Main, sub, and kit concepts, click here.


