Use location routing when one selling channel has more than one marketplace fulfillment location and you need Inventory Ahead to send inventory to the correct marketplace location based on each product’s Inventory Rule / LinkRule.
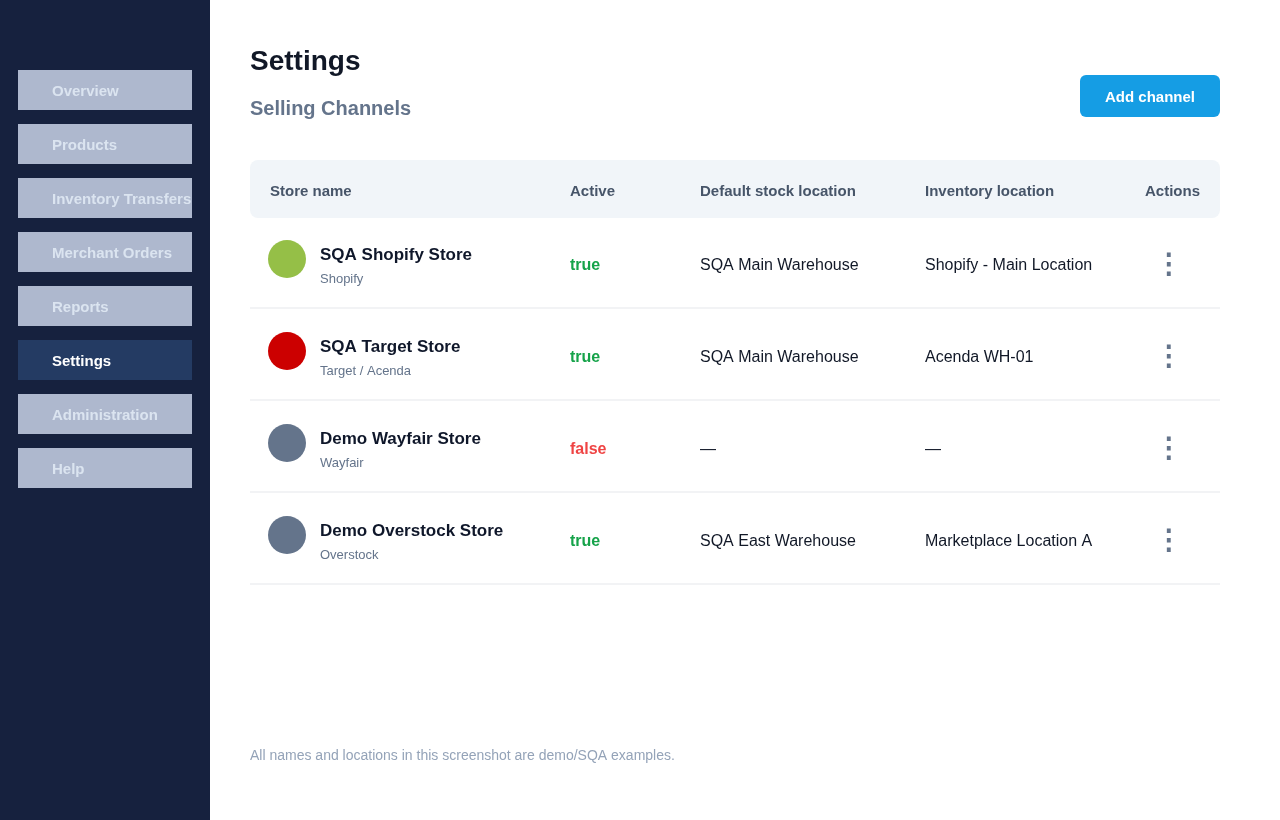
The screenshots below use demo/SQA names only. Replace them with your own store, warehouse, and marketplace-location names when configuring your account.
Where this is available
| Marketplace | Mapping type | Menu label | Destination |
|---|---|---|---|
| Shopify | Inventory Rule / LinkRule → Shopify location | Shopify inventory routing | Shopify location |
| Target / Acenda | Inventory Rule / LinkRule → Acenda warehouse | Acenda inventory routing | Acenda warehouse |
| Wayfair / Overstock | Store Warehouse Links | Store Warehouse Links | Marketplace location linked to Inventory Ahead warehouse |
Important: Shopify and Target/Acenda use the LinkRule routing modal. Wayfair and Overstock use Store Warehouse Links when store locations exist; that is location mapping, but not the same LinkRule routing flow.
Before you start
- Create the Inventory Rules first under Settings → Inventory Rules.
- Assign the correct Inventory Rule to each product/listing that should route to a specific marketplace location.
- Make sure marketplace locations have been imported/fetched for the store. If the dropdown is empty, reconnect or refresh the store locations first.
- Set the store’s default stock location. Products without a matching rule mapping fall back to the default location.
Shopify inventory routing
- Open Settings → Selling Channels.
- Find the Shopify store.
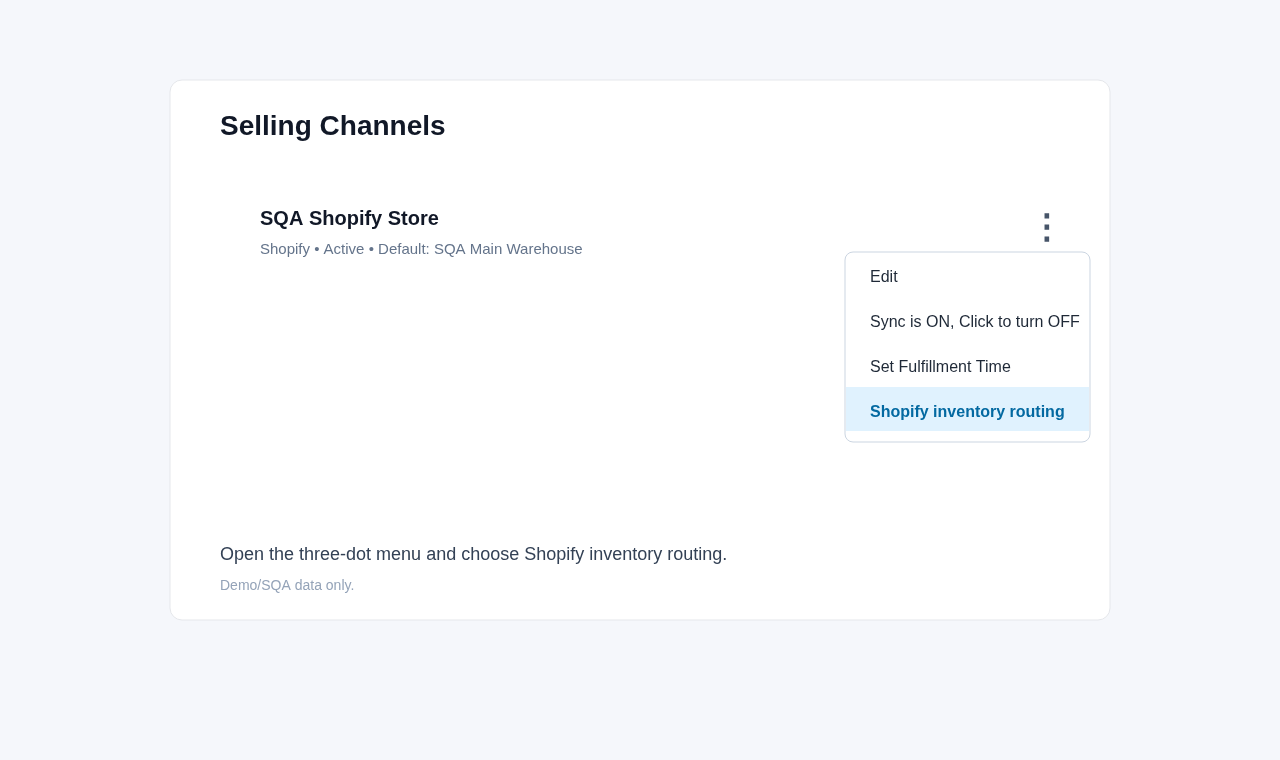
- Open the three-dot action menu.
- Click Shopify inventory routing.
- Turn on Enable LinkRule routing.
- For each Inventory Rule, select the Shopify location that should receive inventory for products using that rule.
- Click Save on each row you change.
When routing is enabled, Inventory Ahead sends inventory to the mapped Shopify location for products with that Inventory Rule. Products without a mapping use the store default Shopify location.

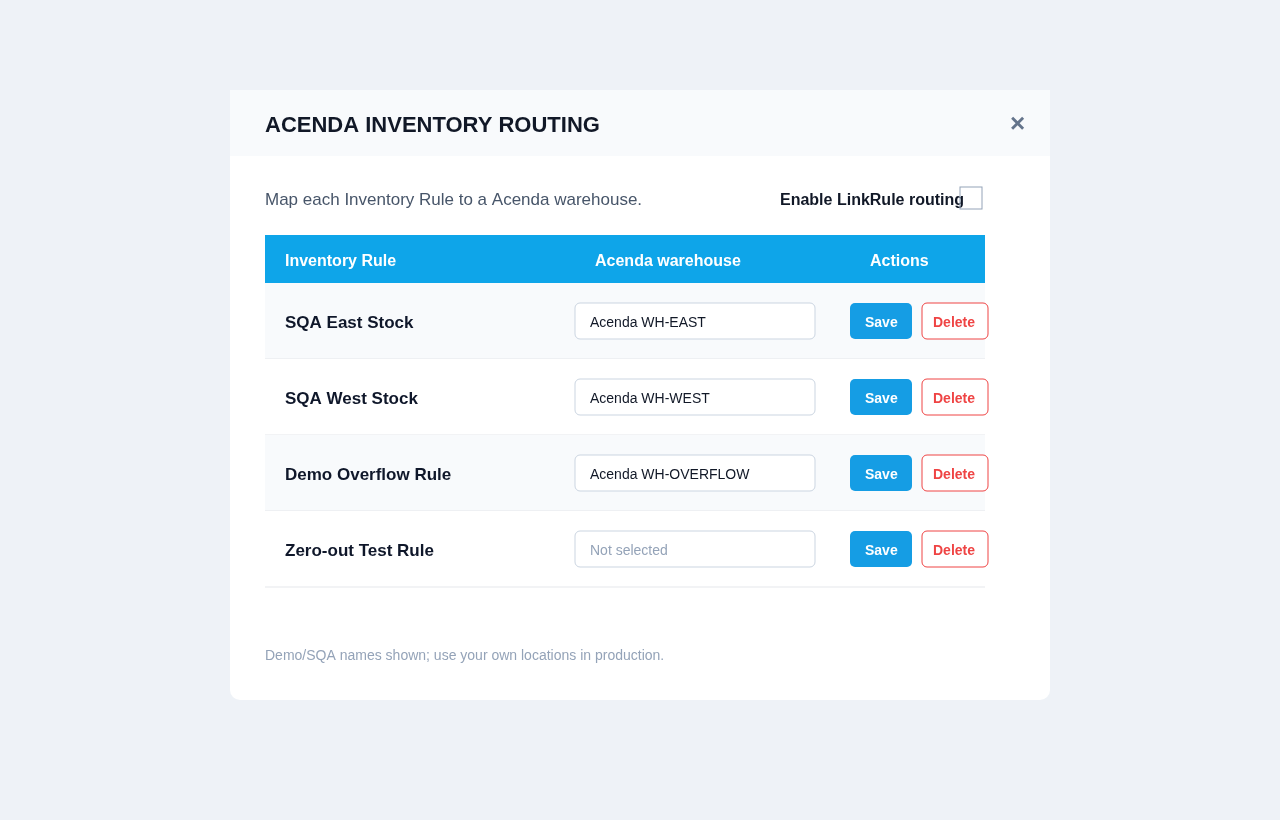
Target / Acenda inventory routing
- Open Settings → Selling Channels.
- Find the Target / Acenda store.
- Open the three-dot action menu.
- Click Acenda inventory routing.
- Turn on Enable LinkRule routing.
- For each Inventory Rule, select the Acenda warehouse that should receive inventory.
- Click Save on each row you change.
When routing is enabled, Inventory Ahead sends inventory to the mapped Acenda warehouse for products with that Inventory Rule. Products without a mapping use the store default Acenda warehouse.
Changing or deleting a mapping
- To change a mapping, pick a new destination in the dropdown and click Save.
- To remove a mapping, click Delete on that row.
- If routing is turned off, the store returns to the default-location behavior.
Troubleshooting
- No locations in the dropdown: confirm the marketplace store is connected and its locations were fetched.
- Product still goes to the default location: check that the product has the expected Inventory Rule and that the rule has a saved mapping in the routing modal.
- Mapping is saved but inventory did not update immediately: wait for the next marketplace inventory sync or trigger the store’s sync job.


