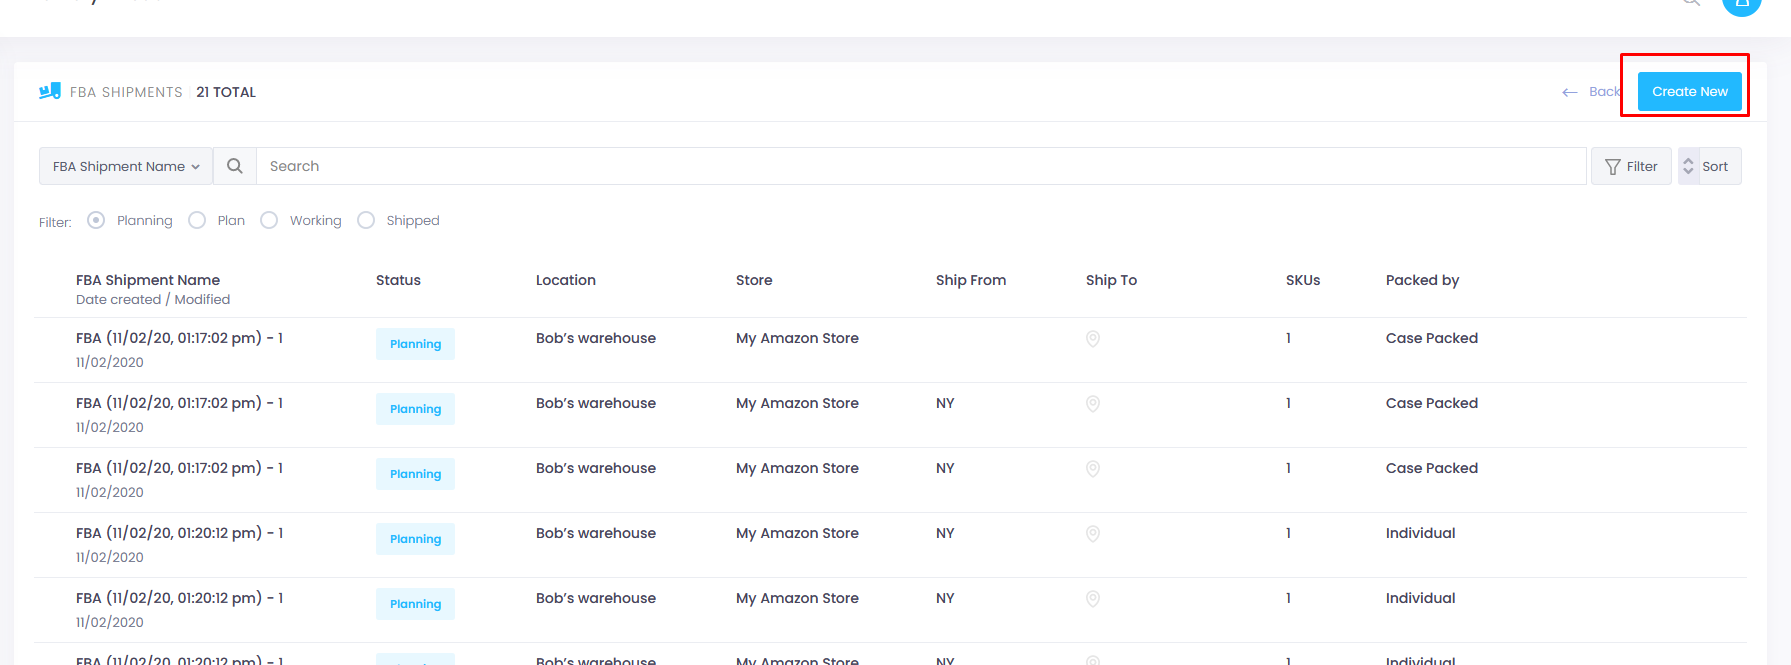
Navigate to the FBA shipment page.
Click on the “Create new” button positioned at the top right corner.
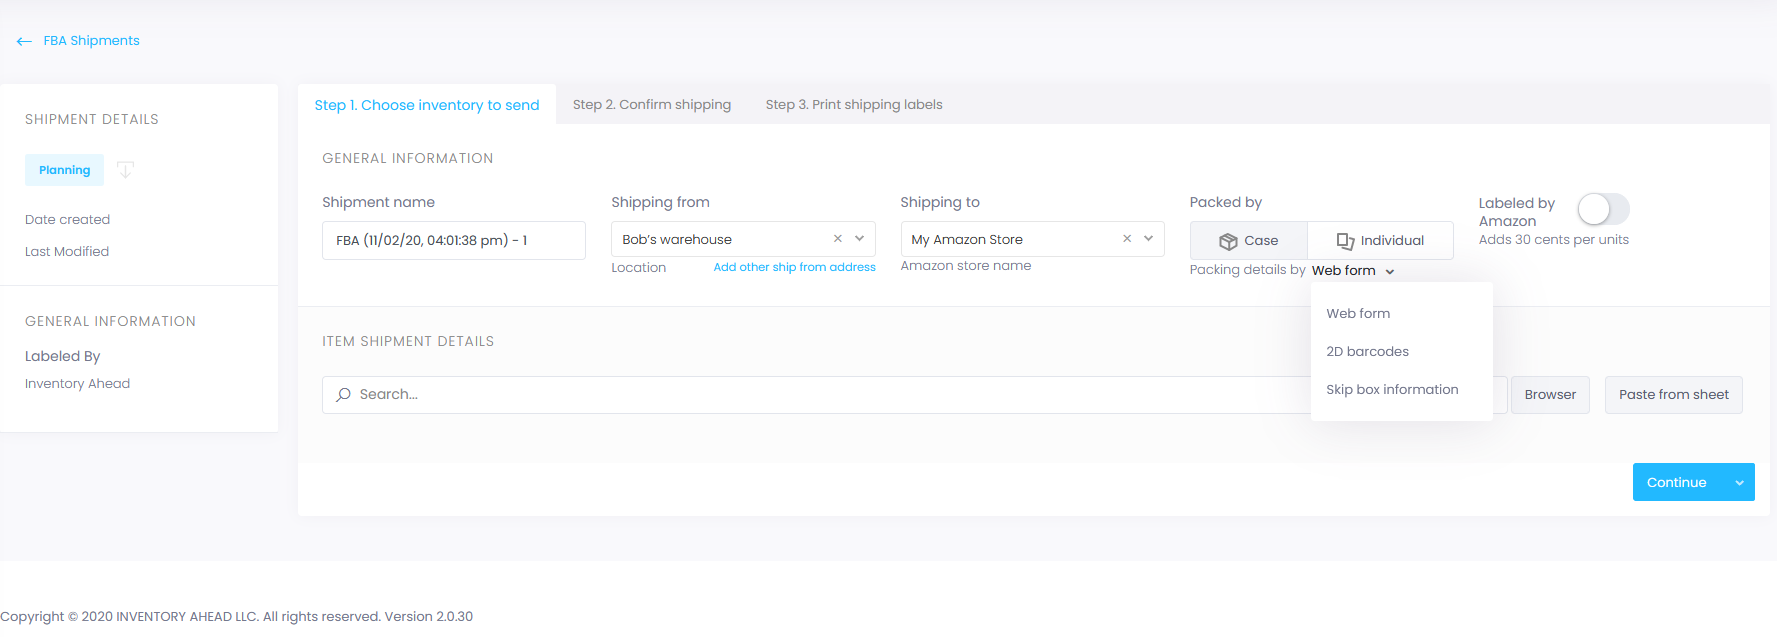
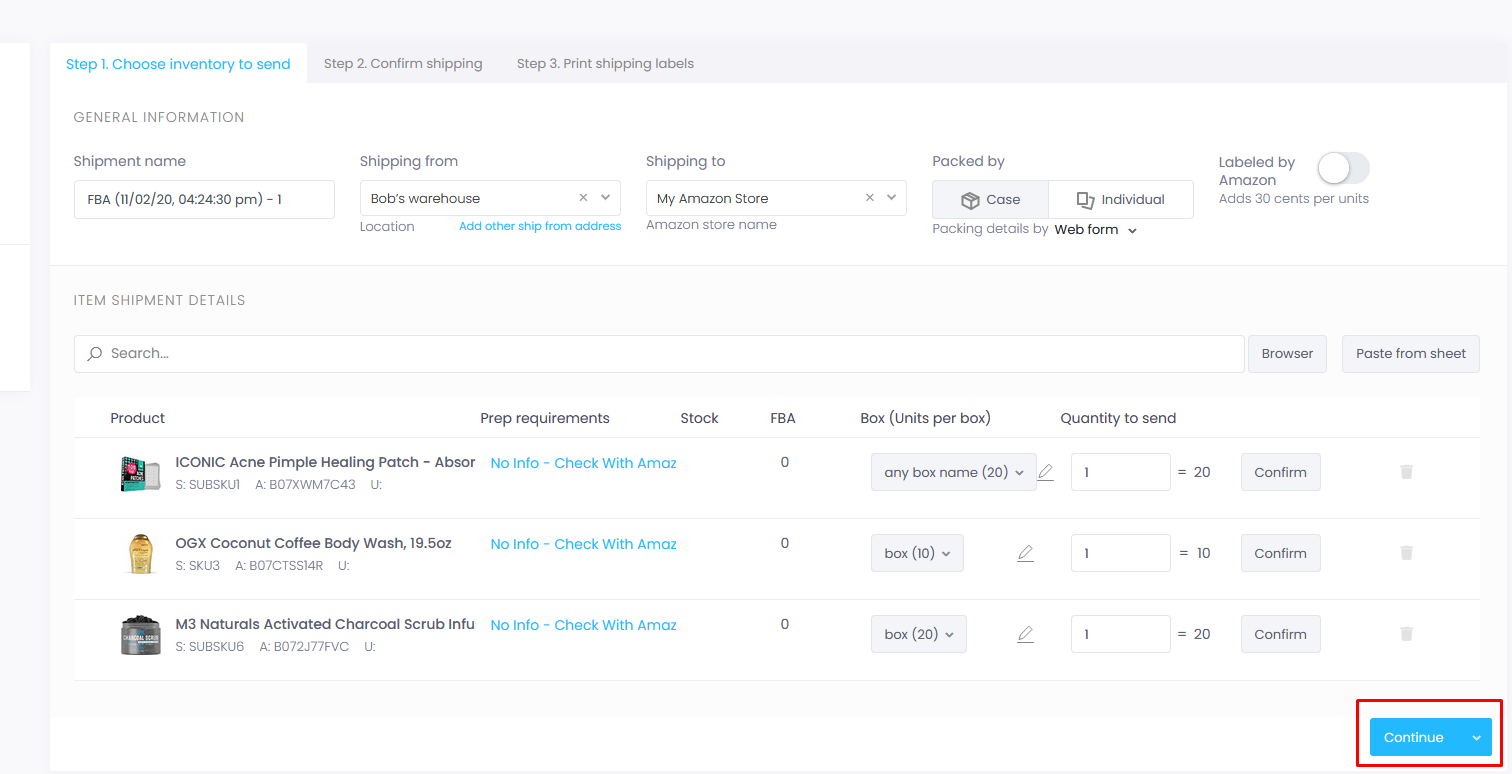
Select the warehouse from which you physically ship the items (you can modify the address by clicking on ‘Add Other Ship From Address’) and specify the Amazon store for which you are creating the shipment. Then, choose whether the items are packed in cases or individually (you can change this later) and determine how you want us to submit the information to Amazon (you can also modify this later)
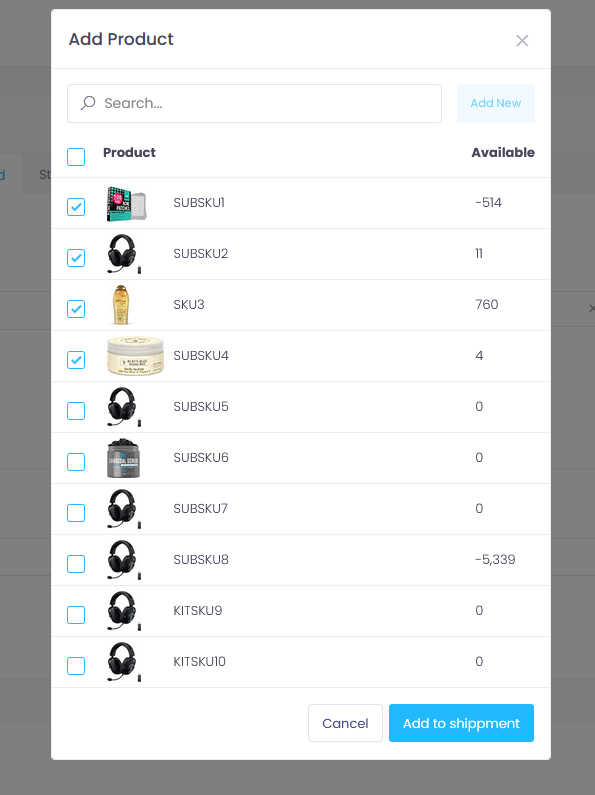
Click on Browse and select your products.
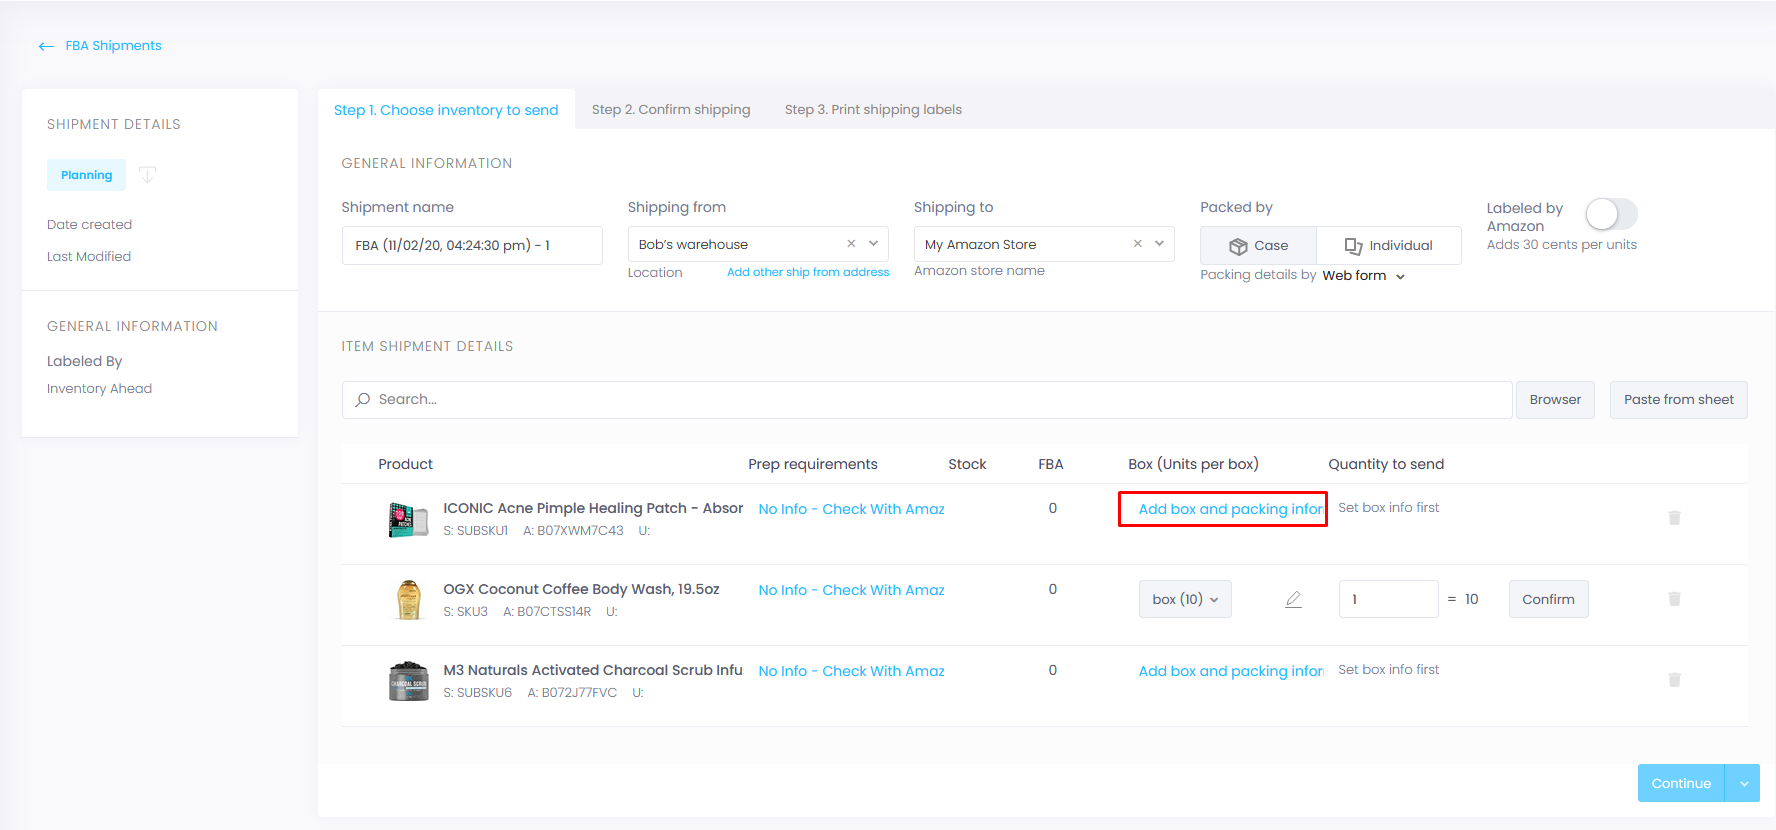
If you select the “case” option, you will need to enter the box configuration for the first time. Click on “Add Box” to provide the packing information.
Please fill out the required box information and then click “Save” to proceed.
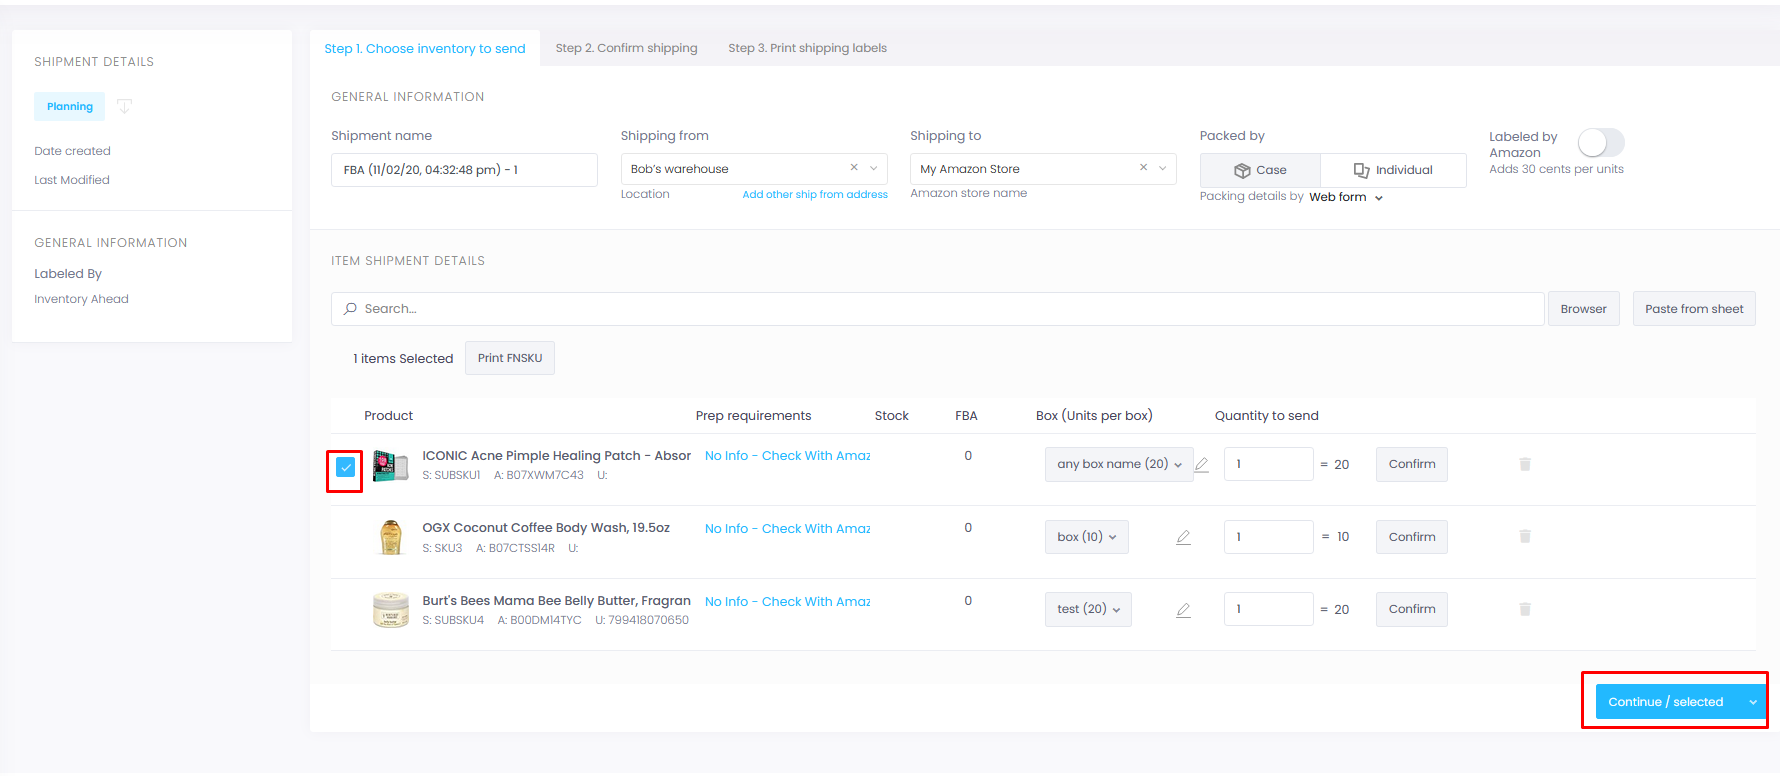
Clicking “Continue” will send all your SKUs to Amazon. However, if you only want to start with one SKU, select that particular SKU and click “Continue.” Please note that an image is required for all SKUs.
Image for only one SKU.
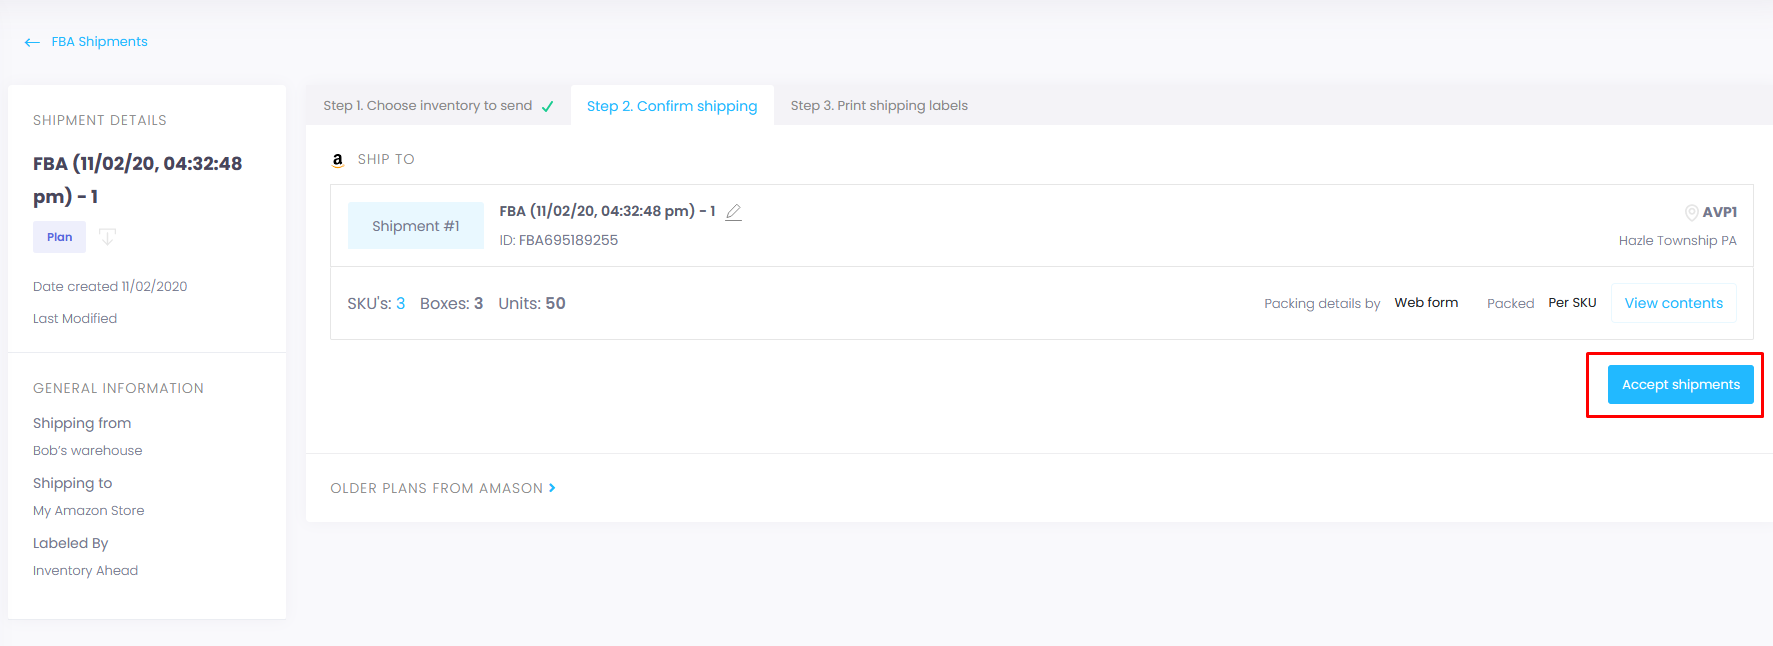
Once you click “Continue,” you will see the Amazon location and the option to split the shipment if needed. At this point, you have two options: you can either accept the shipment or go back to step 1 to make any necessary fixes. Click on “Accept Shipment” to proceed with the process.
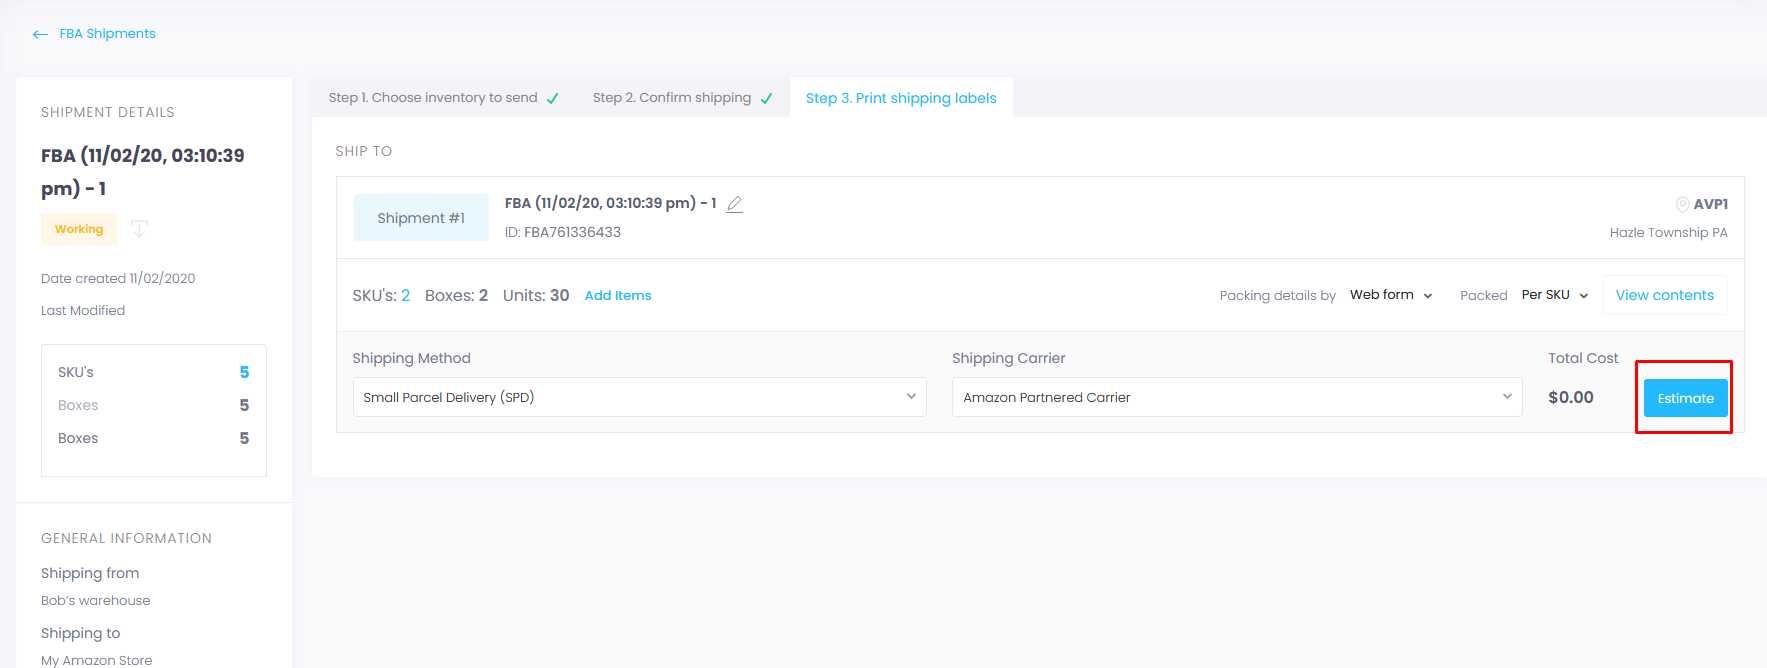
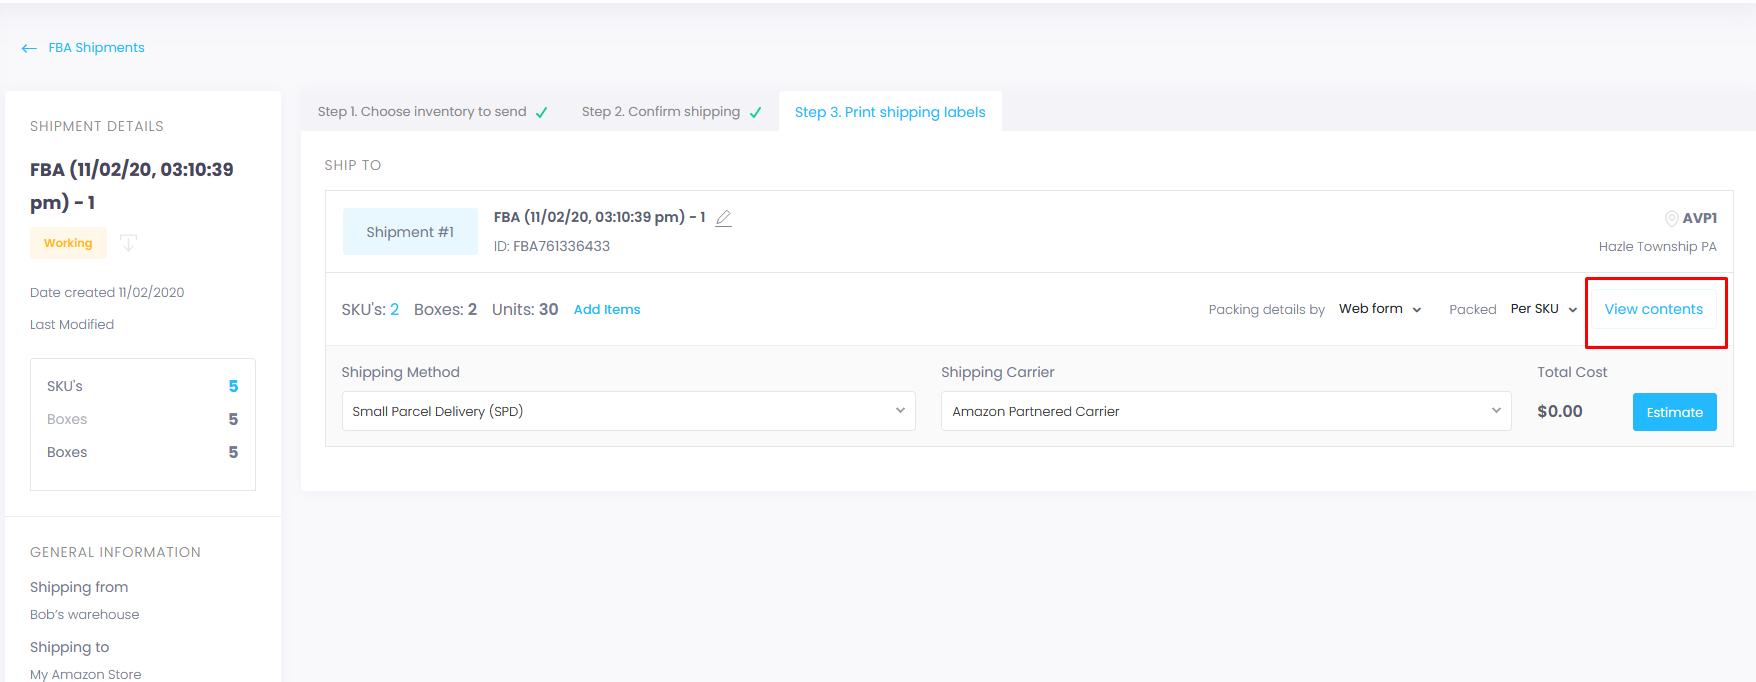
After that, you will reach the final working page. If you don’t need to make any further changes, simply select your shipping method and shipping carrier. Then click on “Submit” or “Estimate,” depending on whether you are using an Amazon carrier or not.
If you want to make any changes, click on View contents
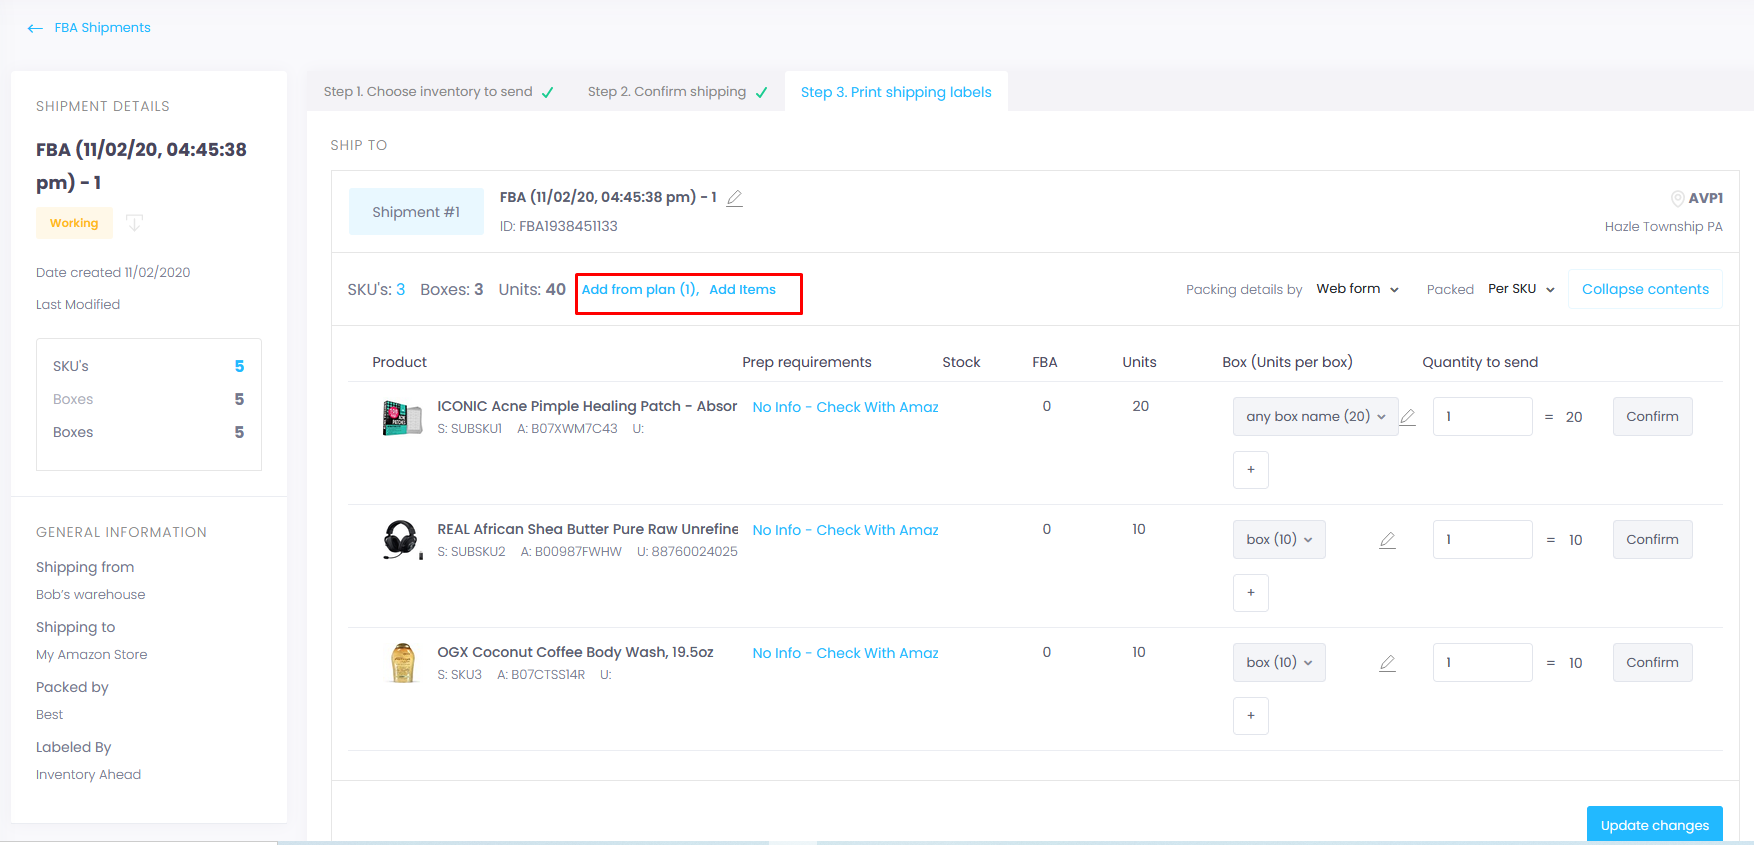
When you click on “Add Items,” you have the option to add new items or select items from the master list to include in your plan.
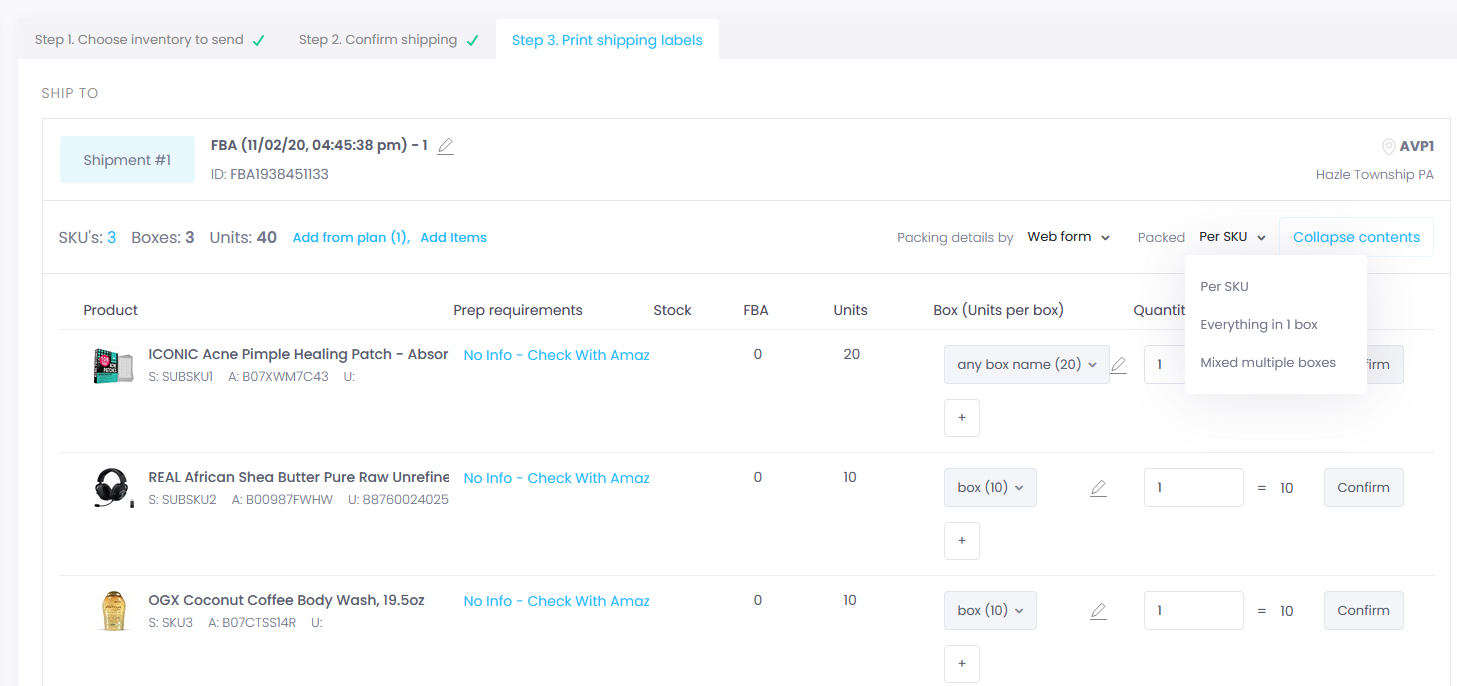
After making the necessary updates, you need to wait for Amazon’s approval. Additionally, you have the option to modify the packing details if needed.
