Viewed 11
Updating your inventory in bulk is very simple! Follow the below step-by-step guide on how to accomplish that!
- Navigate to the Inventory Page.
- Click on the up ⬆ arrow on the top right-hand corner.
- Scroll to the bottom, and select the template “Inventory” under “Templates Samples“.
- On the downloaded CSV file, fill out the required fields:
- SKU: List all SKUs you’d like to update inventory for. Note, no subs can be listed.
- Quantity: Fill out the new updated inventory number. Note, this number will override the previous inventory number and this will display as your warehouse count.
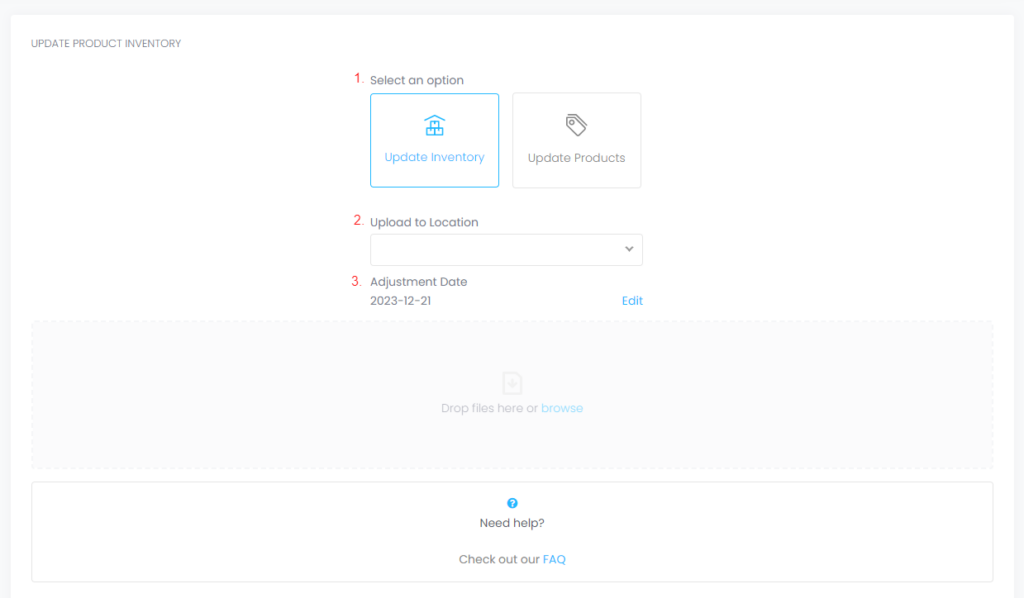
- Back to Inventory Ahead, click on “Update inventory”. Then select the location where you would like to make the update.
- (Optional) You can also choose to change the date of upload. Selecting a previous date, will adjust the inventory going back to that date.

- Click on the “Browser” to select your CSV file, or drag and drop.
- Be sure the correct columns are mapped, and follow the prompts.
Notes:
- It may take up to an hour for the changes to reflect on your account.
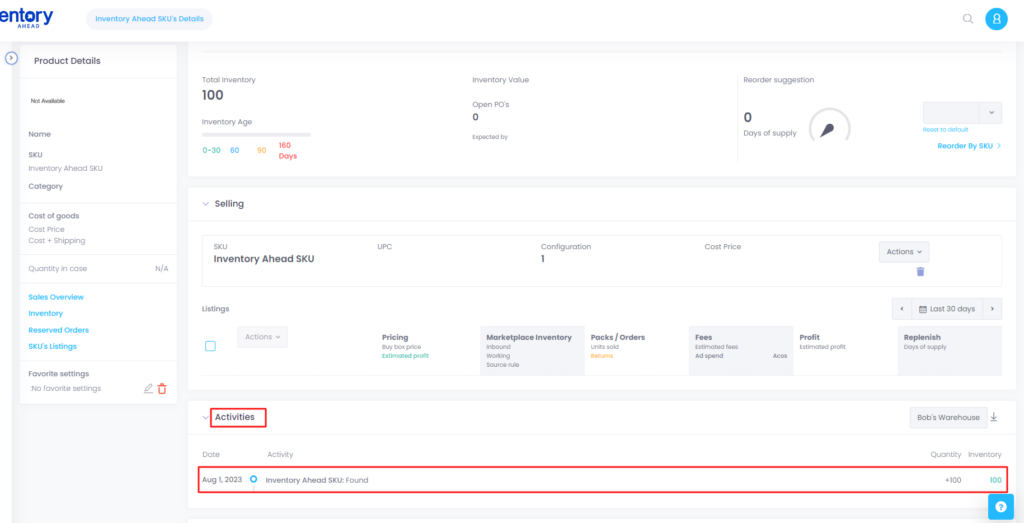
- You can view the updated changes by viewing the actions in the products details page.


