Are you considering taking a well-deserved break or planning a vacation? Maybe you aim to enjoy your holiday without any interruptions. Follow these straightforward steps to activate the vacation mode for your inventory, ensuring a peaceful holiday period.
Here’s how to go about it:
Go to “Settings” > “Inventory Rules”.
On the next page, you can either modify an existing rule or create a new one.
- To modify an existing rule, simply click on the rule name.
- To add a new rule, click on “Add new rule” at the top right-hand corner of the page.
Now, you have three options to set up the vacation mode.
Option 1: Manual Inventory Setting
- In the “Inventory” field, input the number “0” (or any number you desire).
- Under the “Assign to” field, assign the rule to your desired store(s).
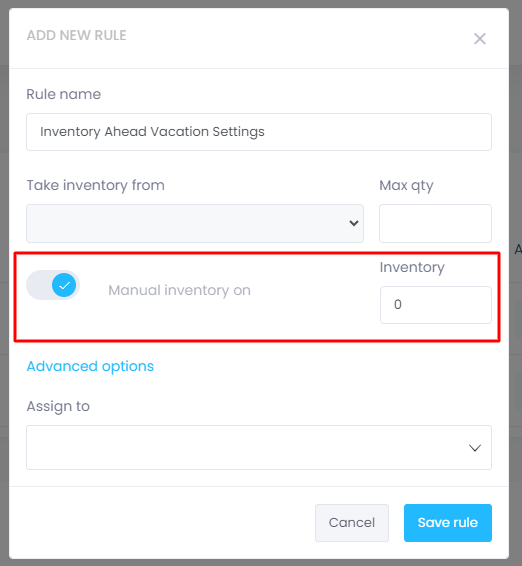
This number will remain static and this action will notify all your assigned channels that the stock in your local warehouse is at zero ensuring you won’t receive any orders during your vacation.
Option 2: Fulfillment Latency Setting – (Only works for Amazon stores).
- Click on “Advanced options.”
- Under “Fulfillment latency,” enter the number of days it will take you to fulfill your orders.
- Under the “Assign to” field, assign the rule to your desired store(s).
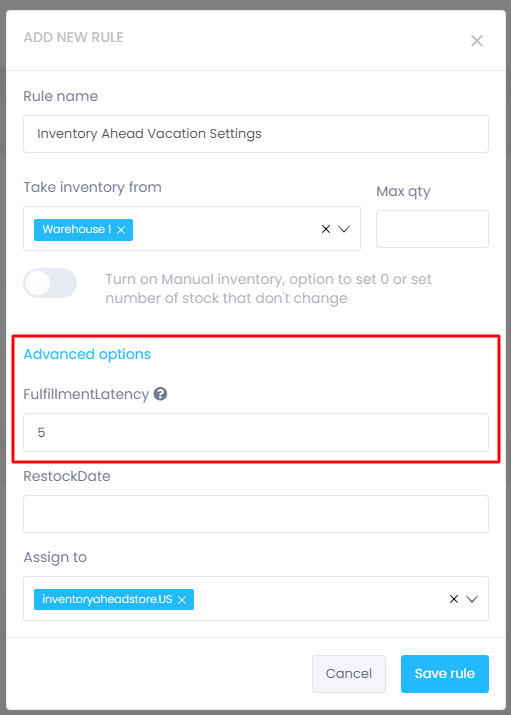
With this setting enabled, your current inventory will be displayed on your channel, along with the specified fulfillment time.
Option 3: Restock Date Setting – (Only works for Amazon stores).
- From your Inventory rule, click on “Advanced options.”
- Under “Restock date,” enter the date when you will start shipping out the orders.
- Under the “Assign to” field, assign the rule to your desired store(s).
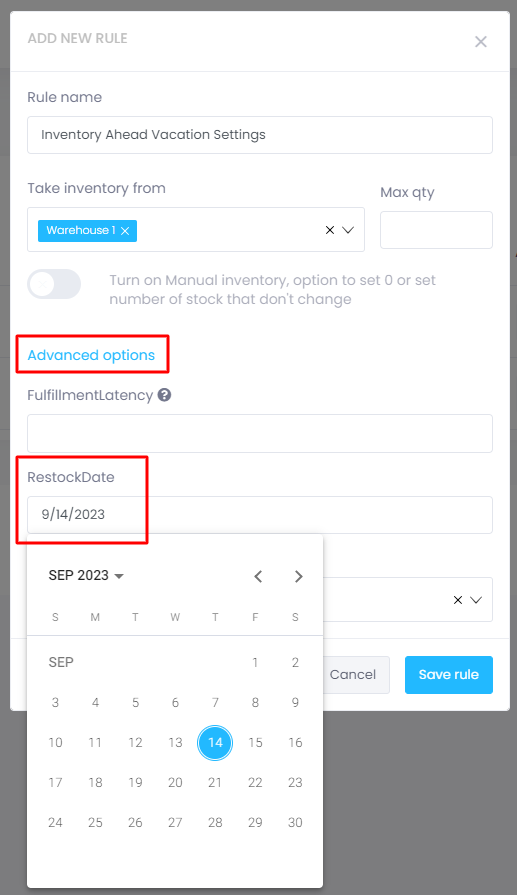
With this setting enabled, your current inventory will be showcased on your channel, along with the expected restocking date.
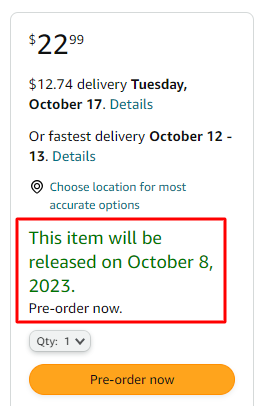
Option 4: Release Date Setting – (Only works for Amazon stores).
- From your Inventory rule, click on “Advanced options.”
- Under “Release date,” enter the date when you will begin fulfilling orders.
- Under the “Assign to” field, assign the rule to your desired store(s).
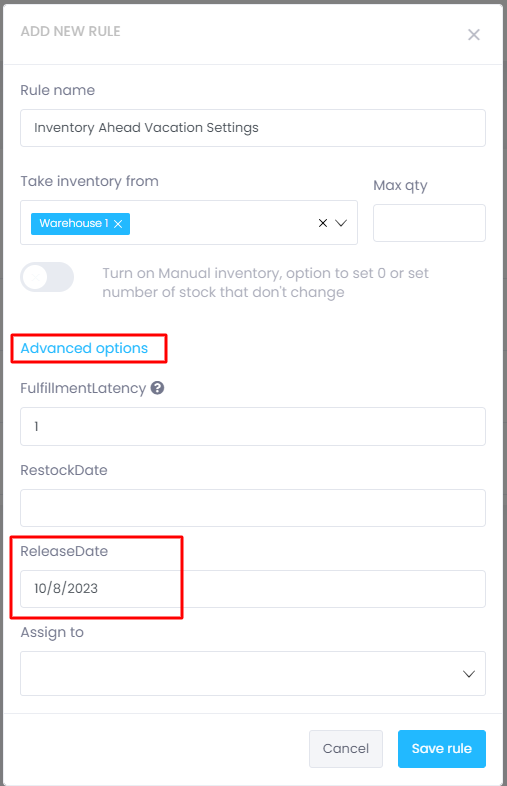
With this settings, you can can choose a date which will display on Amazon, of the time you will continue fulfilling orders.
This is what it will look like on Amazon:
Note: If you select both a Release Date and a Fulfillment Latency, the number of latency days will be added in addition to the release date.
Once you have configured all the necessary fields, click on the “Save rule” button, and you are now prepared for a relaxing vacation!
After your vacation, be sure to revisit and modify the rule to accurately reflect your warehouse’s current stock levels. This step is crucial to ensure that your inventory management remains up-to-date and aligned with your business operations.


