Below is a step-by-step guide on how to create a purchase order with the projected reorder numbers.
Navigate to the “Inventory tab” on the products page.
.png)
By default, all the products show up on the products page. When it comes to reordering, you can filter the page to see only the products that need to be reordered.
See below how to do so:
Click on “Advanced Filters” and navigate to the “Filter by status” option. Type in “Reorder” to filter the results based on this status. Next, select the specific reorder rule that you want the system to use for calculating the reordering.
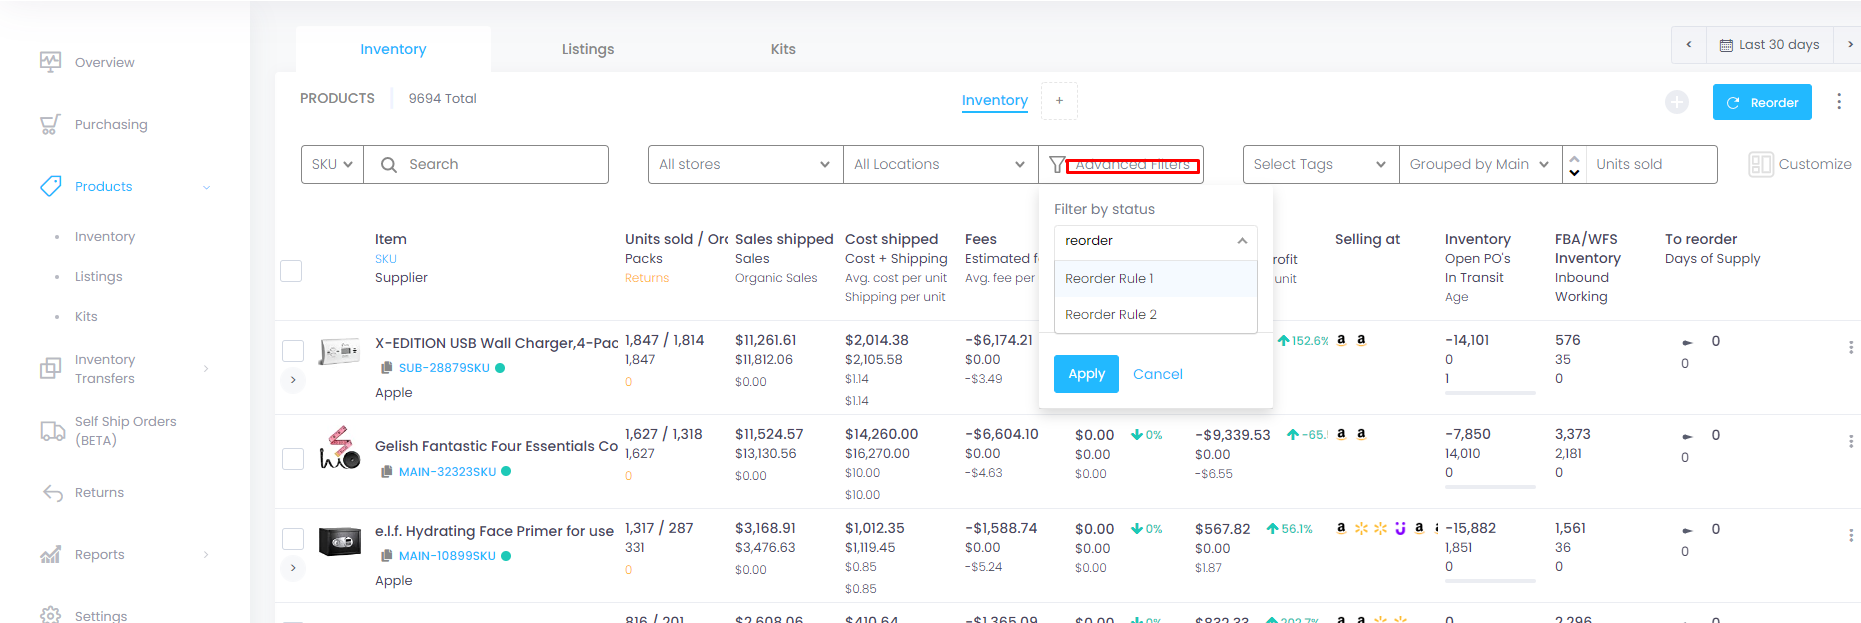
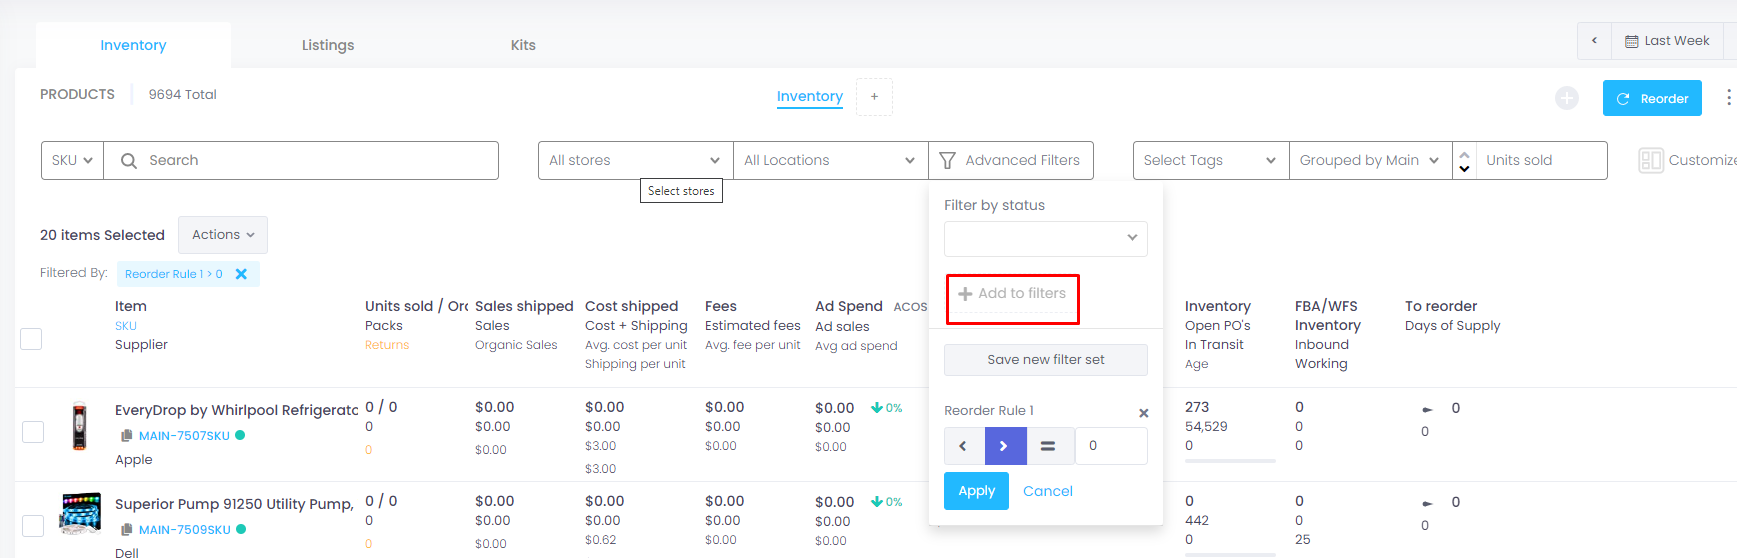
Click on “Add to filters”, select the greater sign (“<“), and then click on “Apply”.
Now the page will be filtered to see only the products that have a reorder amount greater than 0.
Select the items you want to reorder and click on “Reorder”. (You can select all products by clicking on the first check box next to the titles.)
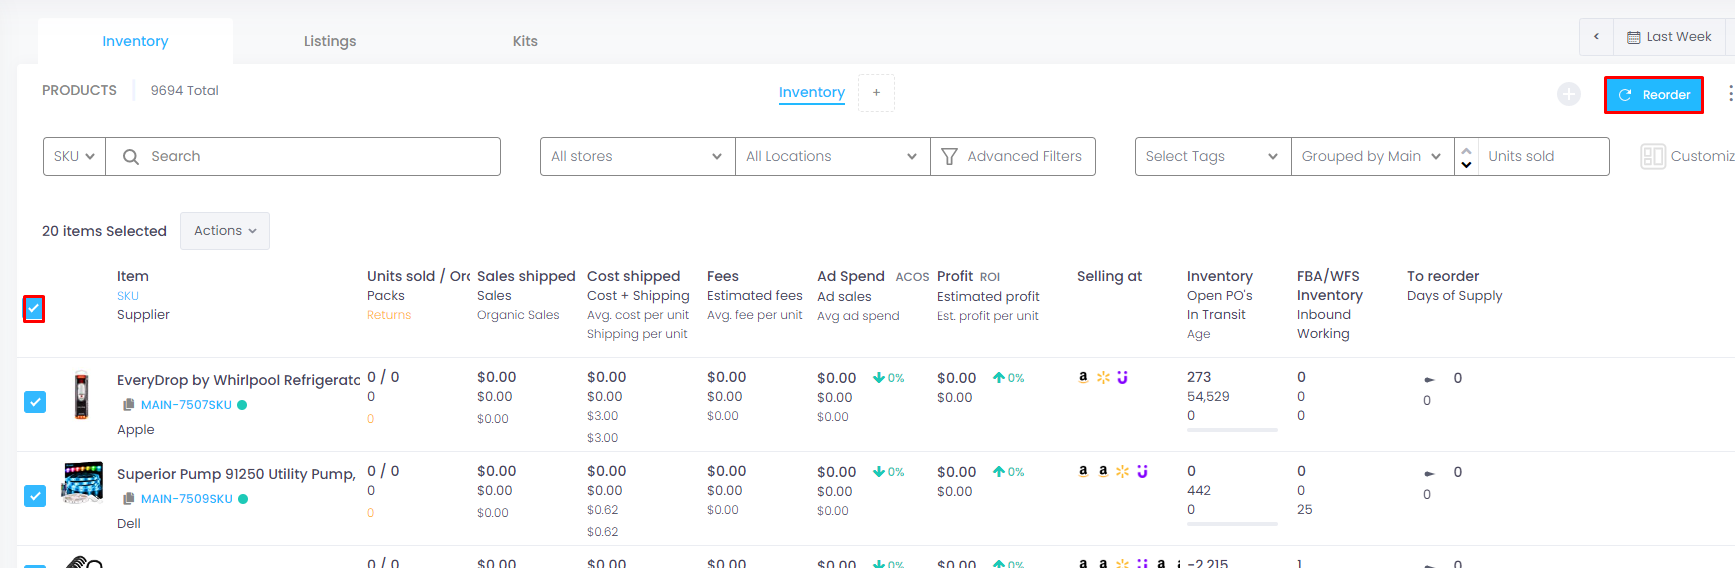
Here, you still have the option to modify the reorder quantity for specific products. You can also change the reordering rule for individual products, and the calculation will be adjusted accordingly. If you are satisfied with the reorder quantities, you can click on “Reorder” once again to proceed.
.png)
Now you will automatically see for every supplier a separate draft PO.
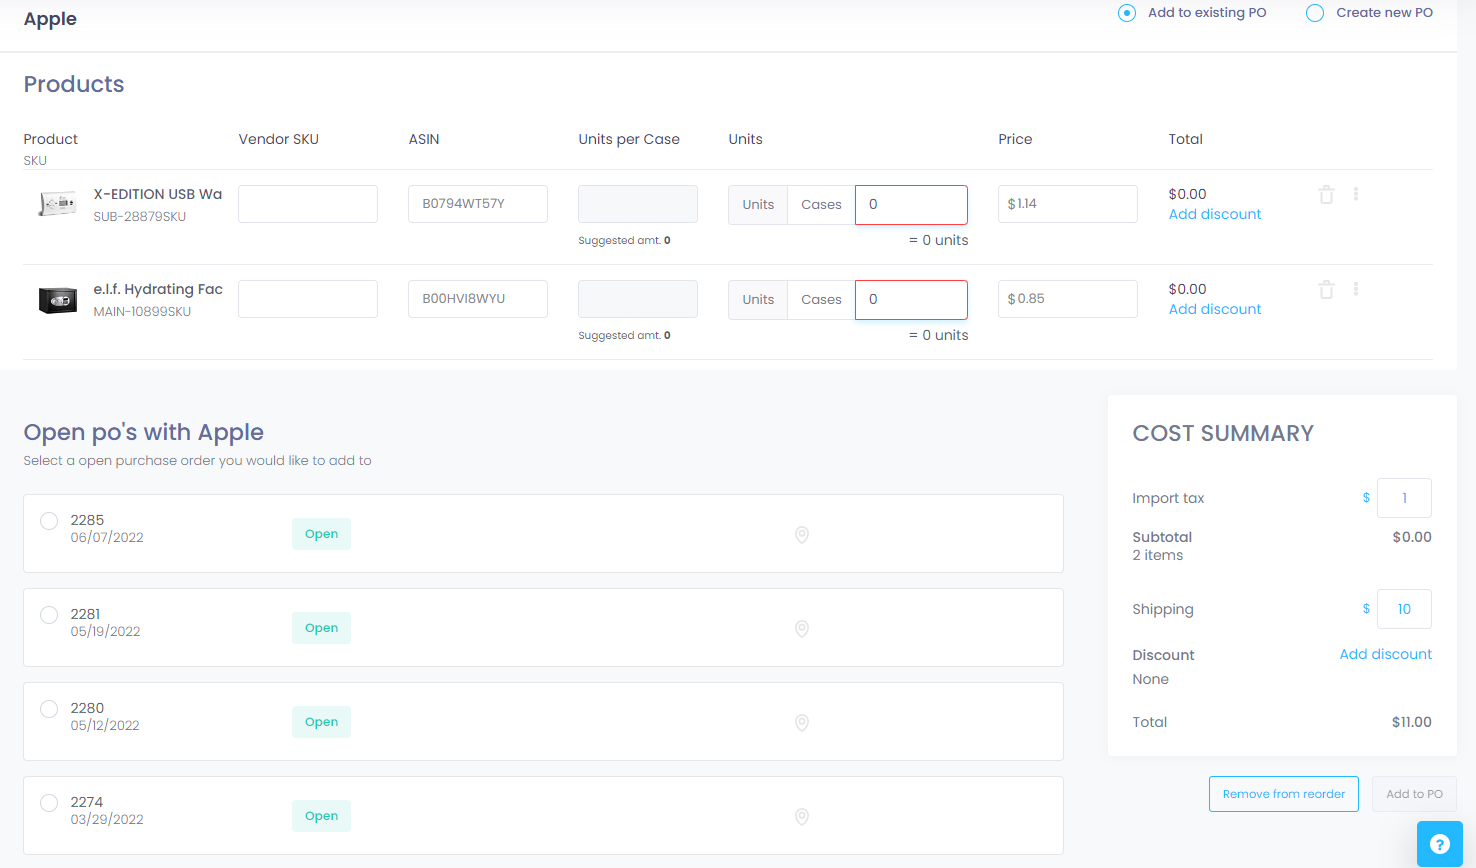
The only required field that needs to be filled in on the “General Information” section of the Purchase Order (PO) is the supplier name. The other fields are optional and can be added as needed.

If your supplier has a different SKU, then enter the Vendor SKU as shown below.
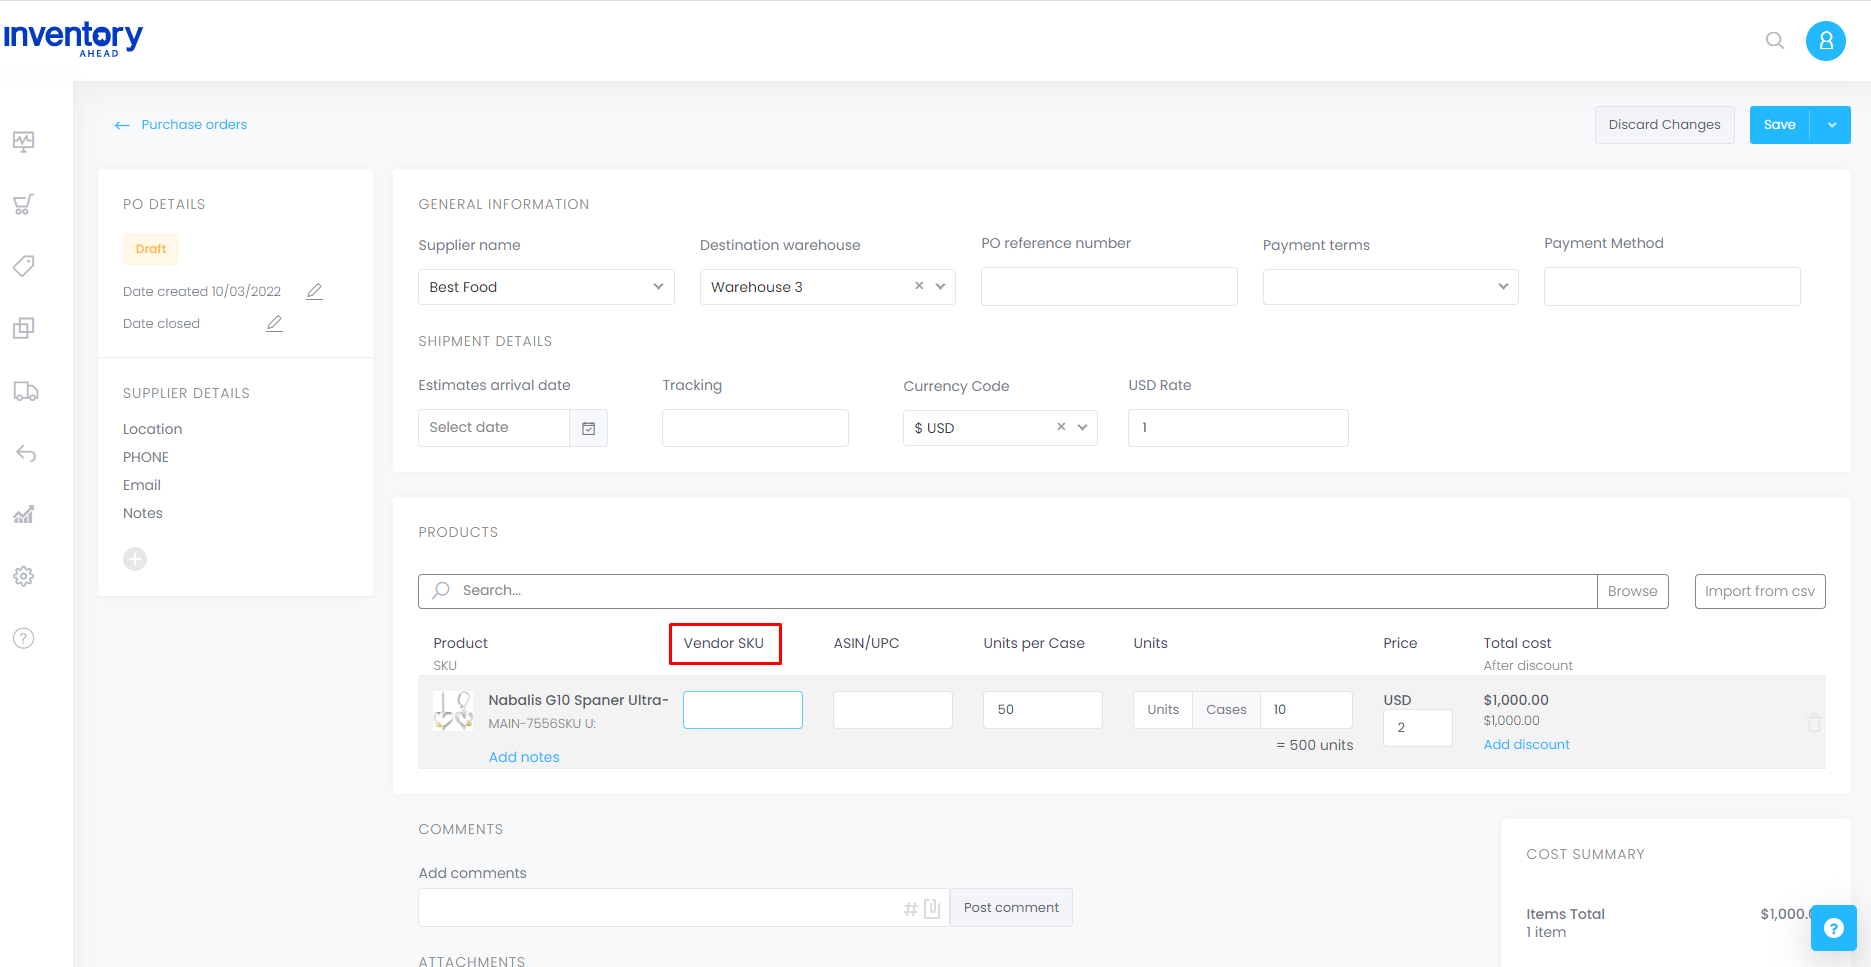
If you reorder by case, enter the number of “Units per case”, and then the number of cases.
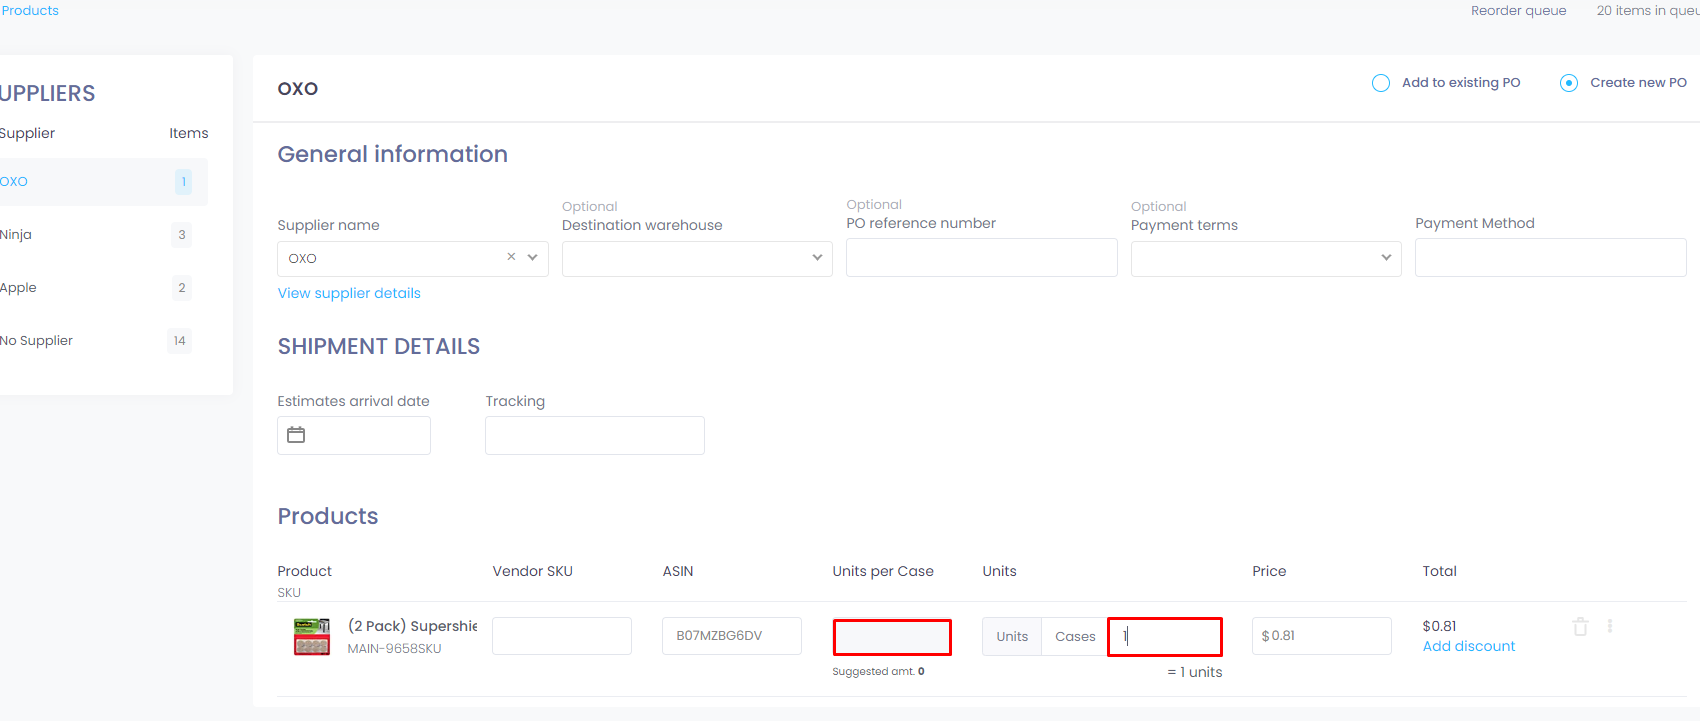
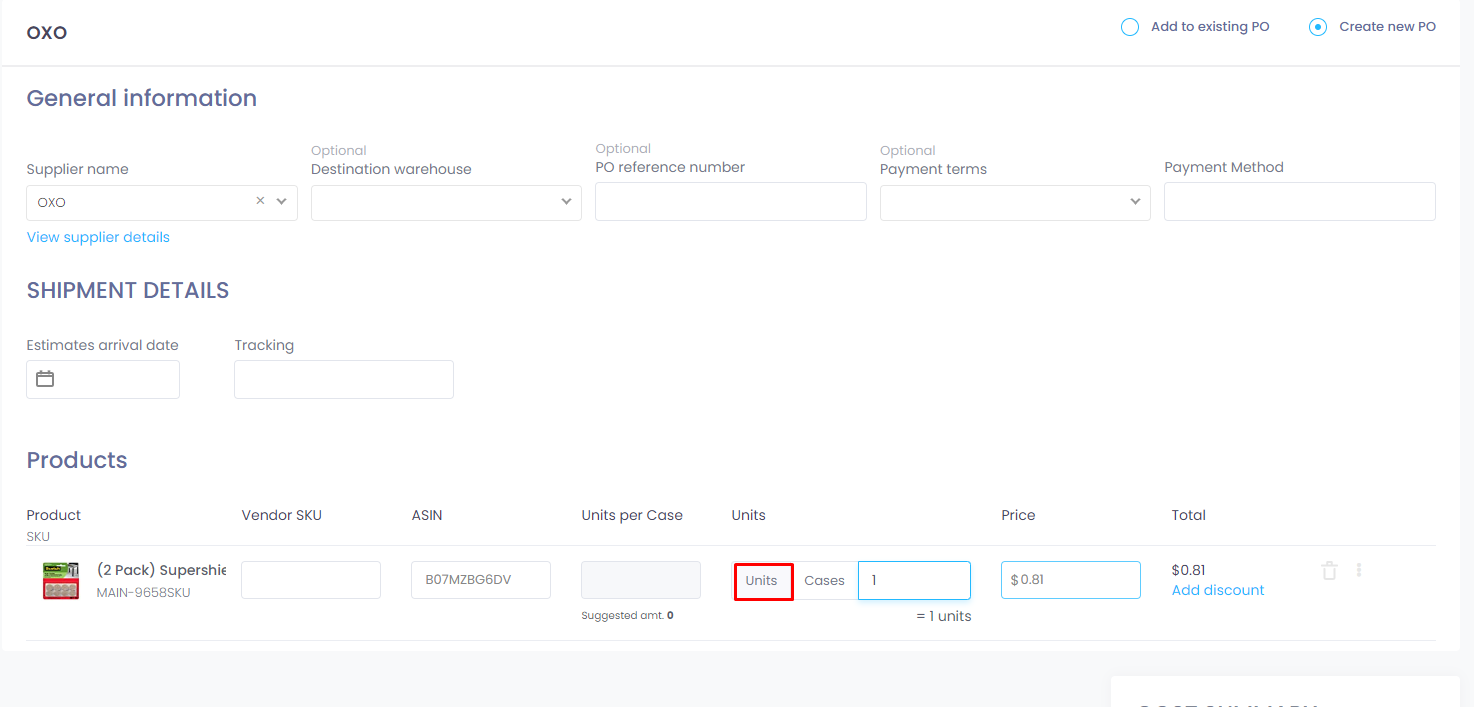
If you choose to reorder by units, click on the “Units” field and enter the desired number of units you want to reorder. As a result, you will see the price per unit under the “Price” column and the total cost price for that specific product under the “Total” column.
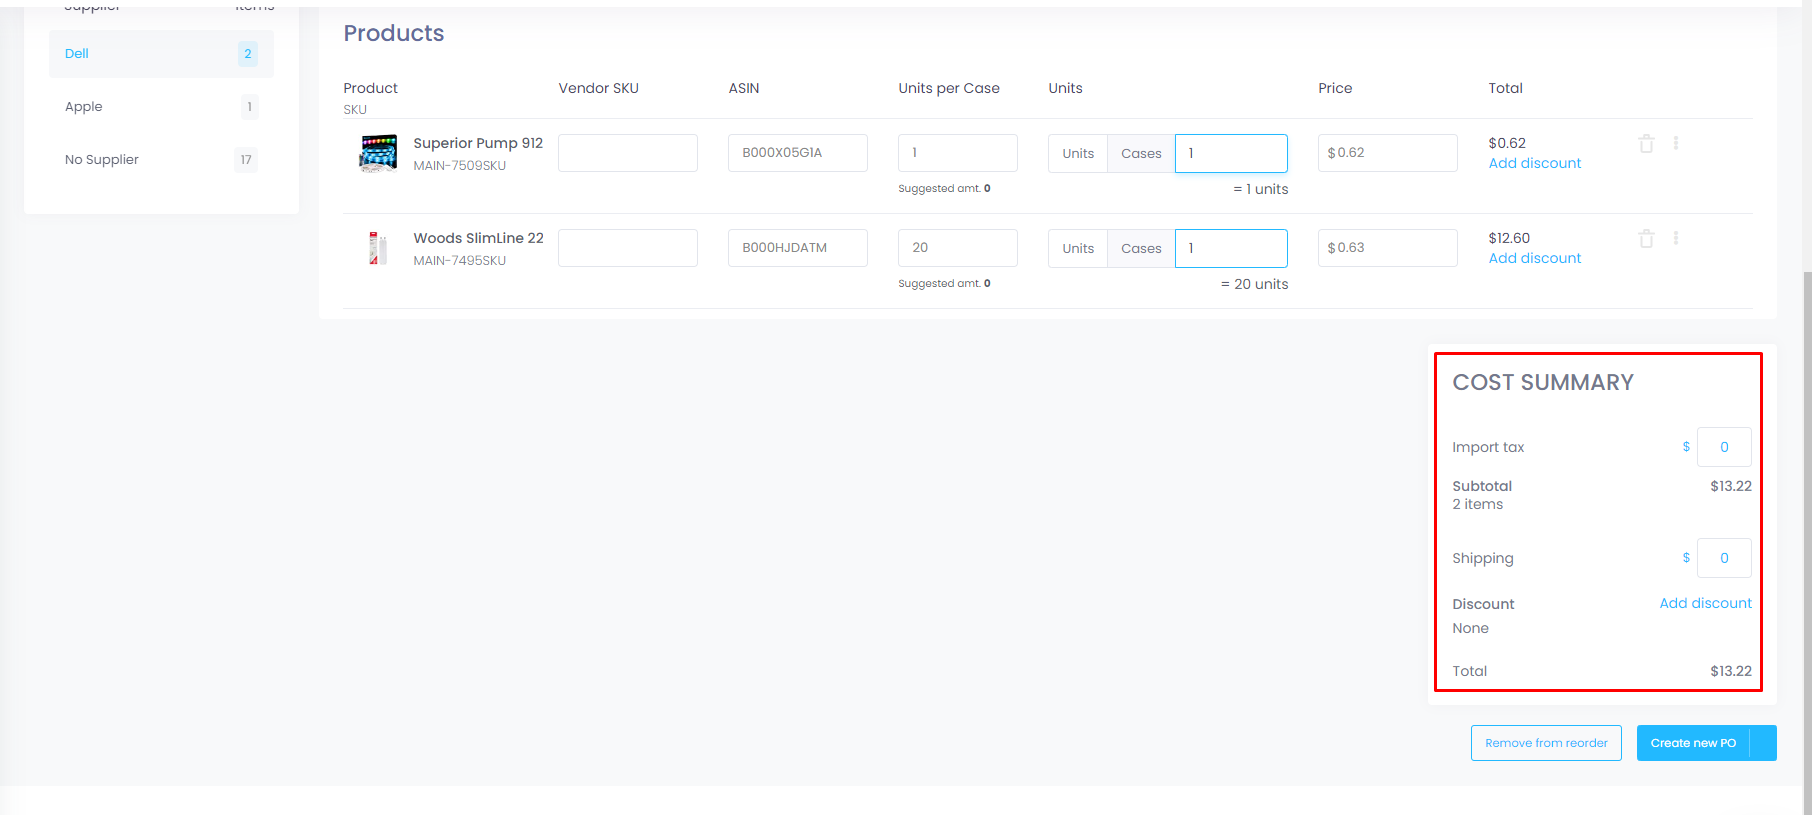
You can add here a discount to a specific product in dollars or percent.
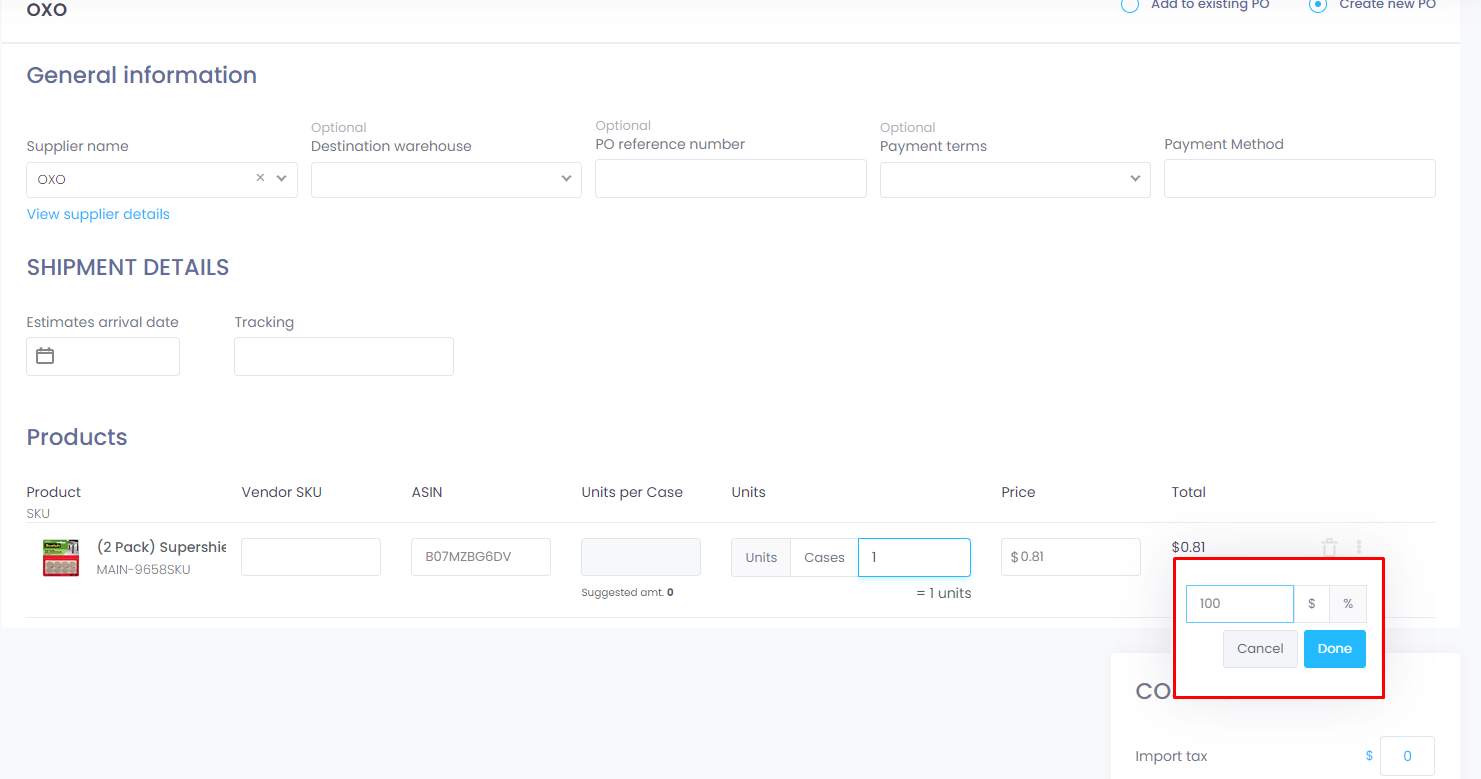
Here you can add any additional cost to the PO. Furthermore, if you wish to apply a discount to the entire PO, you can enter the discount percentage in the “Discount” field.
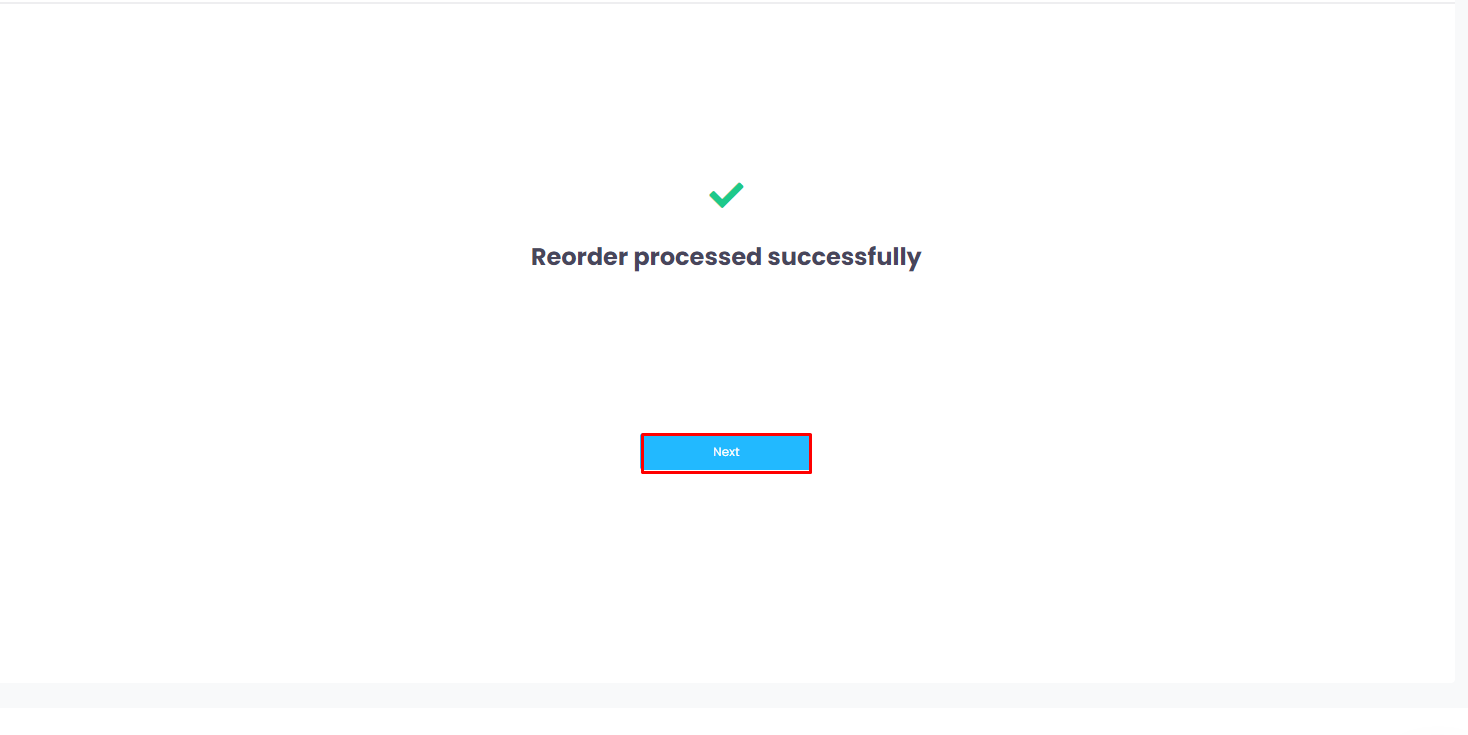
When you are done click on “Create new PO”.
You can now click on “Next”.
You can now continue to fill out the information for each supplier separately.
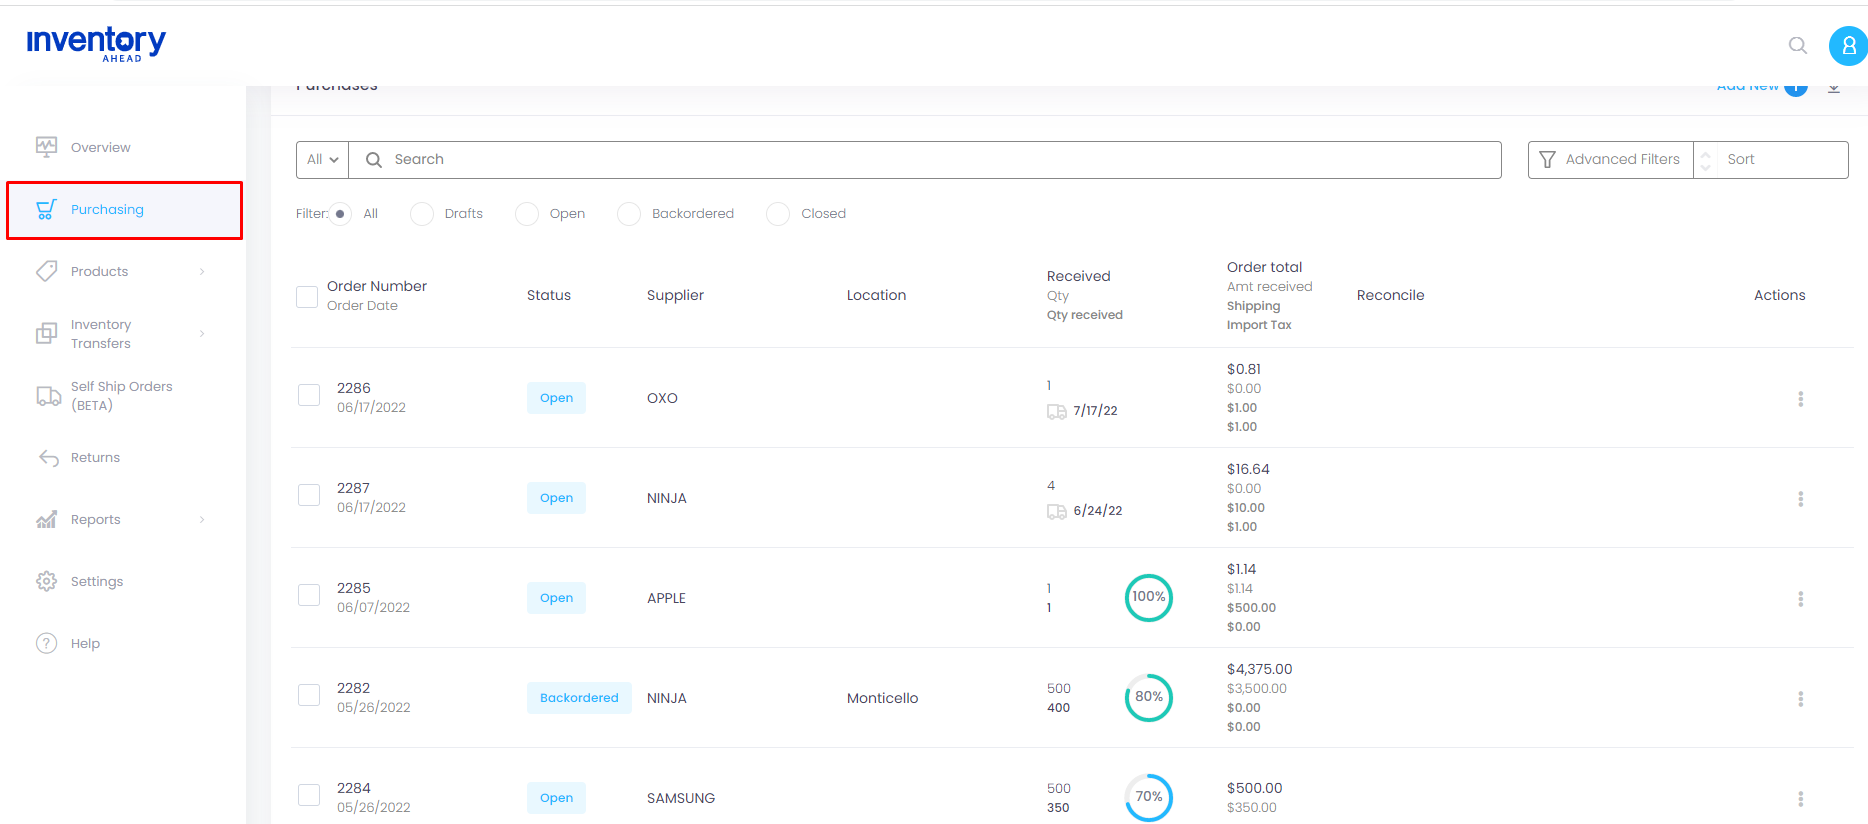
Once the Po is created you go to the purchasing page, where you can download a PDF statement to send to your supplier.
Here you can see some other related articles.


